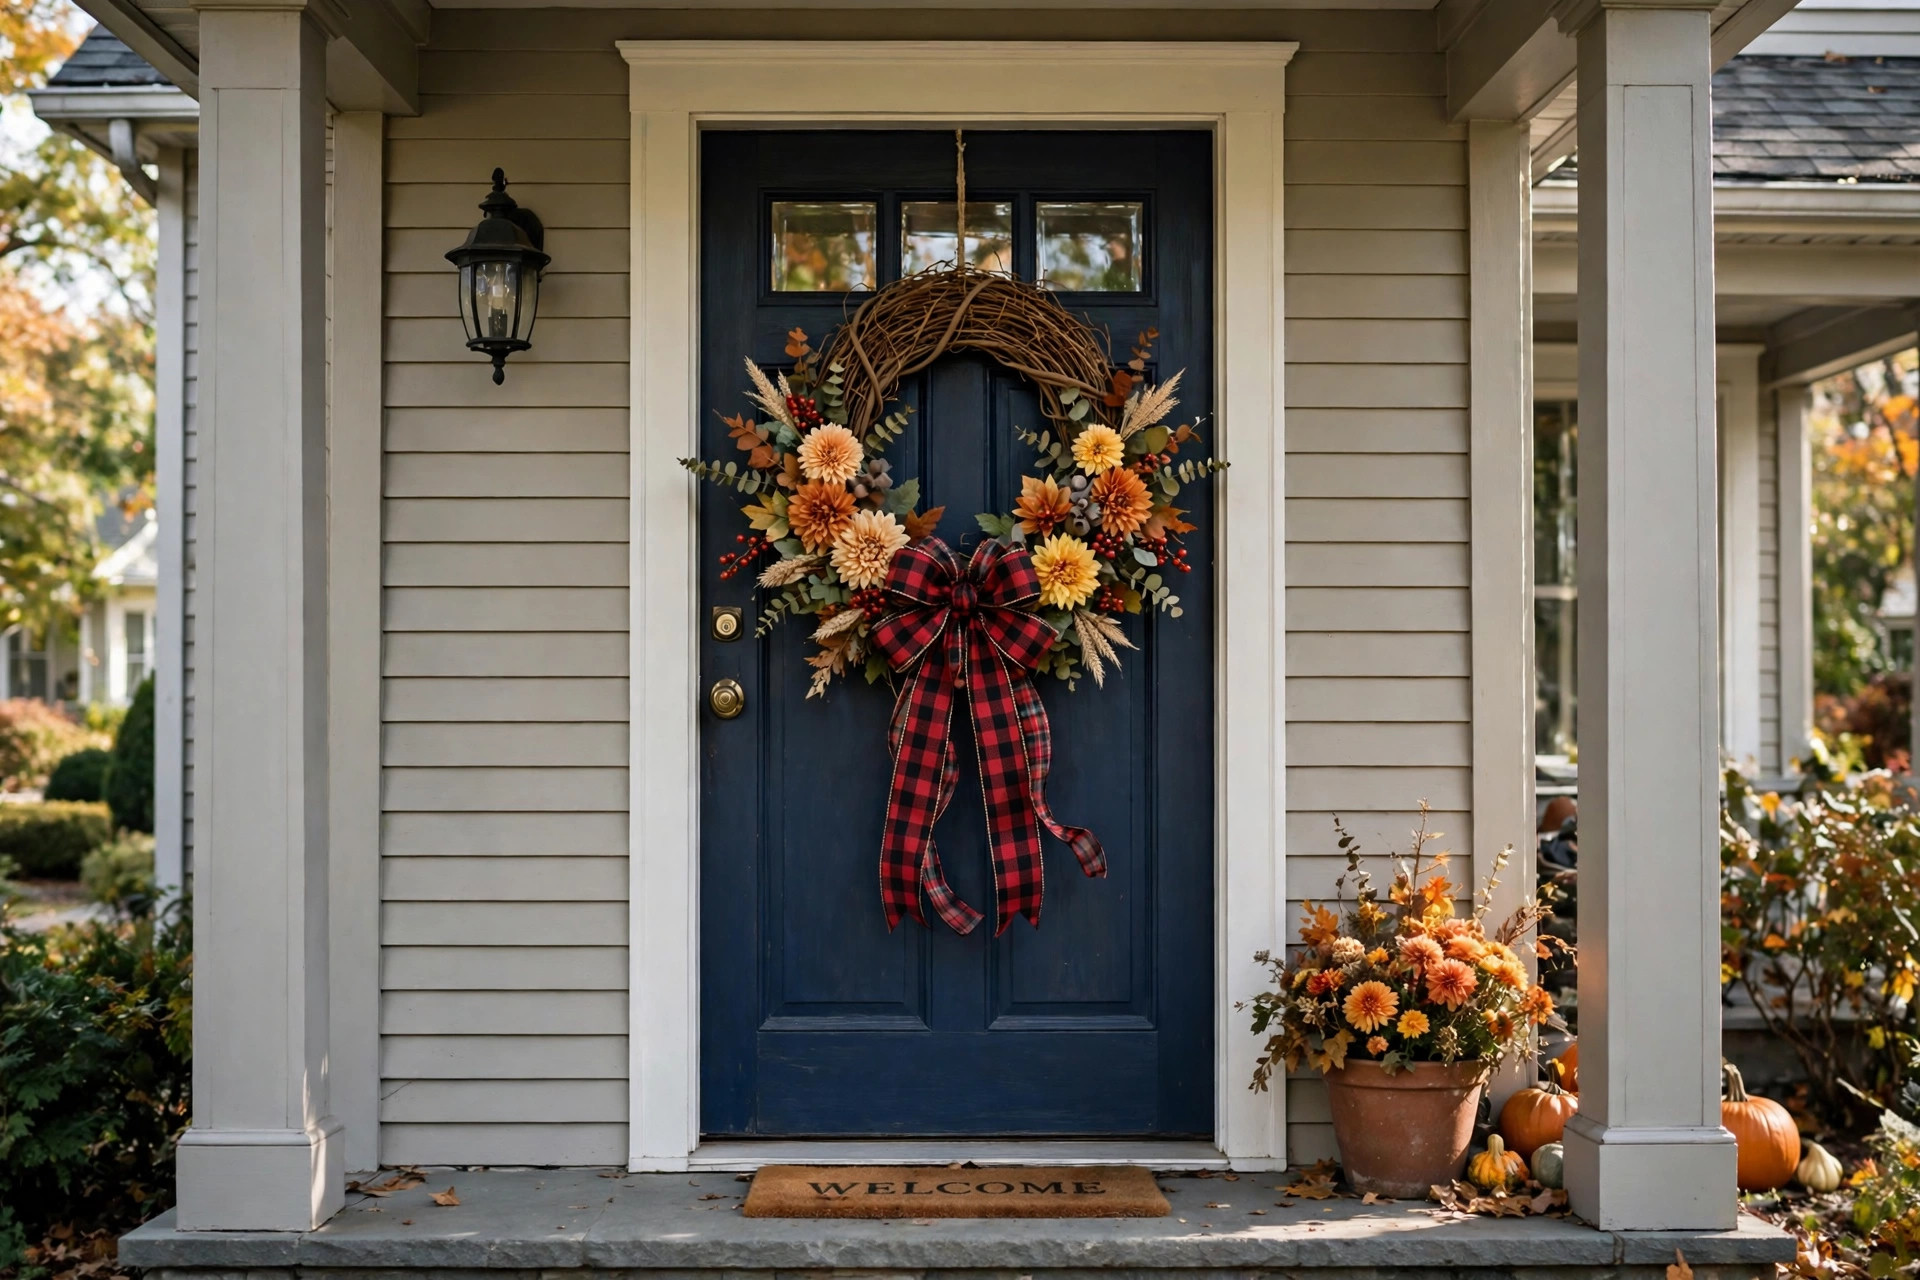

A front door tells guests what kind of home stands behind it. A wreath speaks before anyone knocks. It says welcome. Store-bought wreaths can look fine, but they cost more, and thousands of other doors wear the same one. A diy wreath making kit for front door decor changes that. The kit holds the frame, the greens or flowers, the ribbon, and the small tools you need. You do the work at the kitchen table on a Saturday afternoon. The result is yours alone. This guide explains what a kit holds, what to look for when you buy one, how much you can expect to pay, how to build your wreath step by step, and how to care for it once it hangs on the door.
Why Build Your Own Wreath
A handmade wreath matches your home. You pick the colors. You match the door paint, the porch furniture, or the season. A blue door looks fine with cream flowers and eucalyptus. A red brick entry looks fine with deep green pine and a plaid bow. No store shelf gives you that exact match. You make it.
Cost is the second reason. A finished wreath at a home goods store can run from sixty to one hundred and fifty dollars. A kit often costs a third of that. Once you own a few basic tools, each new wreath costs even less. You reuse the frame. You buy only fresh flowers and ribbon.
The work itself is the third reason. Wreath making is a calm craft. It takes an hour or two. It asks for your hands, not your head. Many people find it restful. Children can help with safe parts, like sorting flowers or choosing colors. The finished wreath then carries a small story. Guests ask where you found it. You tell them you made it.
What to Look For in a Kit: Diy Wreath Making Kit for Front Door Decor
Not all kits are equal. Read the box or the product page before you buy. A good kit lists every piece inside. A weak kit leaves you guessing and sends you back to the store for glue or wire.
The Frame
The frame is the skeleton of the wreath. Three common types appear in kits.
Grapevine frames are made of twisted vines. They look natural even before you add anything. They hold picks and stems well with wire or glue. They suit rustic and farmhouse styles.
Foam frames are light rings of green foam. You push stem wires straight into them. They suit full, flower-heavy wreaths.
Wire frames are thin metal rings with crossbars. They suit mesh and deco wreaths, where you gather bunches of fabric mesh and tie them to the rings. They are the hardest for a true beginner, so check that the kit includes clear steps.
Pick a frame size that fits your door. Most front doors take a twenty-two to twenty-six inch wreath. Measure your door before you order. A wreath that is too small looks lost. One that is too large blocks the view or hits the door frame.
The Greens and Flowers
Kits use silk, dried, or preserved greens and flowers. Silk lasts the longest and survives rain and sun. Good silk looks real from a few feet away, which is all a front door needs. Dried flowers look lovely but fade in sun and break in wind. Preserved greens keep their color longer than dried ones but still dislike direct sun.
Count the pieces. A kit should give you enough material to cover the frame fully. Thin kits leave bare spots. Look for words like “full coverage” or a piece count in the listing. When in doubt, buy a kit with more flowers than you think you need. Leftover pieces work well as table decor.
Ribbon and Extras
Wired ribbon holds its shape. Plain ribbon falls flat after a week on the door. Check that the kit includes wired ribbon, or plan to buy a spool at craft stores like Michaels. Extras matter too. Pinecones, berries, small ornaments, and wooden signs turn a plain wreath into a finished one. Make sure the kit names them.
Tools and Instructions
Some kits include everything, down to the glue sticks. Others assume you own a glue gun and wire cutters. A good hot glue gun is the single most useful tool in wreath making, and many crafters buy a better one than the mini gun some kits include. Check the tools list before you buy so you are not stuck mid-project. Clear instructions matter just as much. The best kits include a step-by-step guide with pictures, not just a short paragraph on the box.
Types of Wreath Kits
Grapevine Wreath Kits
Grapevine kits suit beginners. The vine base already looks good, so gaps in your work do not show. You wire or glue flowers and greens onto the vines. These kits often follow a rustic style. They work well for fall and winter themes. Many guides from This Old House and Family Handyman show grapevine wreaths because the method is forgiving.
Foam and Straw Base Kits
Foam kits suit flower-heavy designs. You push wired stems into the foam until the ring disappears under blooms. Straw bases work the same way and give a more natural edge. These kits often include silk peonies, hydrangeas, or roses. They suit spring and summer doors.
Mesh and Deco Kits
Mesh kits use rolls of deco mesh, a stiff fabric net that holds curls and poofs. You cut the mesh into squares or strips, gather them, and tie them to a wire frame. The result is big and bold. These kits suit holidays and sports seasons, when people want large color statements. They take more material than you expect. Buy extra mesh if the kit looks thin.
Seasonal and Holiday Kits
Seasonal kits bundle themed pieces: fall leaves and mini pumpkins, winter pine and red berries, spring tulips, summer sunflowers. Buying by season is the simplest path for a beginner. The colors already work together. Country Living publishes many seasonal wreath ideas each year, and a themed kit follows the same logic. Store each season’s wreath carefully and you can rotate them for years.
Cost and Price
Basic kits start near fifteen to twenty-five dollars. These include a small frame, silk flowers, ribbon, and simple instructions. They suit a first try or a child’s project.
Mid-range kits run twenty-five to forty-five dollars. They include larger frames, more flowers, wired ribbon, and extras like pinecones or berries. Most buyers land here. The value is strong. The finished wreath looks like one that sells for twice the price.
Premium kits run forty-five to seventy-five dollars or more. They include large frames, high-grade silk or preserved flowers, and detailed guides. They suit large double doors or buyers who want a showpiece.
Compare with finished wreaths. A ready-made wreath of the same size and fullness often costs sixty to one hundred and fifty dollars at home goods stores. A kit saves real money. The savings grow when you reuse tools and frames. Sites like The Home Depot and JOANN carry both kits and finished wreaths, so you can compare prices side by side before you decide.
How to Build Your Wreath, Step by Step
Set aside one to three hours. Work in good light. The steps below fit most kits.
Set Up Your Work Space
Cover a table with newspaper or a drop cloth. Plug in the glue gun and let it heat. Lay out every piece from the kit. Group flowers by type and color. Read the instructions once through before you start. Many Bob Vila project guides stress this habit, and wreath making is no exception. Ten minutes of reading saves an hour of fixing.
Lay Out the Pieces
Place the frame on the table. Set flowers and greens around it without attaching anything. Try two or three layouts. Step back and look. This dry run shows bare spots before glue makes them permanent. Take a phone photo of the layout you like best. You will thank yourself later.
Attach the Greens First
Greens form the base layer. If the kit uses a foam frame, push wired stems in at an angle so they fan outward. If it uses grapevine, wrap floral wire around stems and vine together, or use hot glue. Work all the way around the ring. Turn the frame as you go so the coverage stays even. Odd numbers of each green type look more natural than even rows.
Add Flowers and Accents
Place the largest flowers first, spaced evenly around the ring. Then fill gaps with medium flowers. Add small accents last: berries, pinecones, tiny blooms. Tuck stem ends deep so no wire shows. Step back often. A wreath reads as a whole from the street, not as single flowers up close.
Tie the Bow and Hang
Cut the wired ribbon long. Make loops by folding the ribbon back and forth, pinching the center. Wire the center tight. Fluff the loops. Attach the bow to the top or bottom of the wreath with wire, not glue, so you can move it. Hang the wreath on a door hook or an over-the-door hanger. Stand back and look at it from the sidewalk. Adjust any piece that sticks out wrong.
If you enjoy kit-based crafts, a candle making kit or a macrame wall hanging kit makes a fine next project for the same craft table.
Care and Upkeep
A wreath on a covered porch lasts far longer than one in full sun and rain. Sun fades silk flowers over a season. Rain soaks straw bases and weakens glue. If your door faces south with no overhang, choose silk flowers and a grapevine or wire frame. Bring the wreath inside during hard storms.
Dust the wreath every few weeks. Use a hair dryer on the cool, low setting and hold it a foot away. Do not use water on dried flowers. Check the hanging wire or hook each month. Wind works hangers loose.
Store wreaths in a box, not a bag. Bags crush flowers. A cardboard box with tissue paper keeps the shape. Store the box flat in a closet or under a bed. Label the box by season. Good storage means a wreath can last five years or more. The Spruce offers detailed seasonal storage guides that apply to wreaths as well as other decor.
Safety
Hot glue burns. A standard glue gun tip reaches temperatures that blister skin in a second. Keep the gun on a stand, not lying on the table. Keep children and pets away from the hot tip. Unplug the gun when you take a break. Good Housekeeping product tests remind crafters every year that most craft injuries are glue burns, and they are easy to prevent.
Wire ends are sharp. Cut stems leave points that scratch hands and snag clothes. Bend sharp ends back into the wreath or cover them with tape. Wear work gloves if your skin is sensitive.
Keep wreaths away from open flame. Dried flowers, straw, and mesh burn fast. Do not hang a wreath on a door with a candle lantern beside it. Do not use real candles in a wreath centerpiece. If the wreath hangs near a light fixture, use cool LED bulbs, never hot incandescents.
Check materials for outdoor use. Paper flowers and untreated wood signs warp in rain. If the kit does not say outdoor-safe, treat the wreath as indoor or covered-porch decor. For general craft safety standards, Blick Art Materials labels its products clearly, which is a good habit to expect from any kit maker.
Frequently Asked Questions
How long does it take to make a wreath from a kit?
Most kits take one to three hours. A simple grapevine kit with pre-cut flowers may take one hour. A mesh wreath with many ties may take three. Beginners should plan the longer time. Rushing shows in the finished work.
Can a complete beginner do this?
Yes. Kits exist for beginners. Choose a grapevine or foam kit labeled for beginners. Avoid wire-frame mesh kits for a first project. Follow the steps in order. The skills are simple: cut, place, glue, tie.
Will my wreath survive rain and sun?
It depends on the materials. Silk flowers and grapevine frames handle weather well. Dried flowers, paper accents, and straw bases do not. A covered porch protects any wreath. If your door has no cover, choose a kit marked for outdoor use.
How long will a handmade wreath last?
A well-made silk wreath lasts three to five years with good storage. Dried flower wreaths last one to two seasons before colors fade. The frame itself lasts far longer. Many crafters rebuild on the same frame each year with new flowers.
Is a kit really cheaper than a finished wreath?
Usually yes. A mid-range kit costs twenty-five to forty-five dollars. A finished wreath of the same fullness costs sixty to one hundred and fifty dollars. The gap grows when you reuse your tools and frames for the next wreath.
Can I reuse the frame for a new season?
Yes. Pull off old flowers and glue with care. Grapevine and wire frames reuse best. Foam frames reuse a few times before they crumble. Keep the ribbon if it still looks fresh, or buy a new spool to change the whole look.
A Short Final Word
A diy wreath making kit for front door decor is one of the simplest crafts with the largest payoff. The cost is low. The time is short. The result hangs where every guest sees it. Buy a kit that fits your door and your season. Read the instructions. Work slowly. Hang it with pride. When the season turns, store it well or build a new one. Your front door will thank you.
References
Blick Art Materials. (n.d.). Art and craft supplies. https://www.dickblick.com Bob Vila. (n.d.). Home improvement advice. https://www.bobvila.com Country Living. (n.d.). Country home and lifestyle. https://www.countryliving.com Family Handyman. (n.d.). DIY home repair and maintenance. https://www.familyhandyman.com Good Housekeeping. (n.d.). Product reviews and home advice. https://www.goodhousekeeping.com JOANN. (n.d.). Fabric and craft supplies. https://www.joann.com Michaels. (n.d.). Arts and crafts supplies. https://www.michaels.com The Home Depot. (n.d.). Home improvement products. https://www.homedepot.com The Spruce. (n.d.). Home and garden advice. https://www.thespruce.com This Old House. (n.d.). Home renovation guidance. https://www.thisoldhouse.com
Was this guide helpful?

About Michael Thompson
The My Garden US editorial team writes practical, in-depth home and garden guides for American homeowners — tested advice, no fluff.
You May Also Like
DIY String Art Kit for Wall Decor Beginners: A Complete Guide
June 1, 2026 0 views
The Best Craft Glue for Paper and Cardstock: A Practical Guide
May 26, 2026 0 views
Best Craft Apron With Pockets for Adults: A Complete Buying Guide
January 29, 2026 0 views