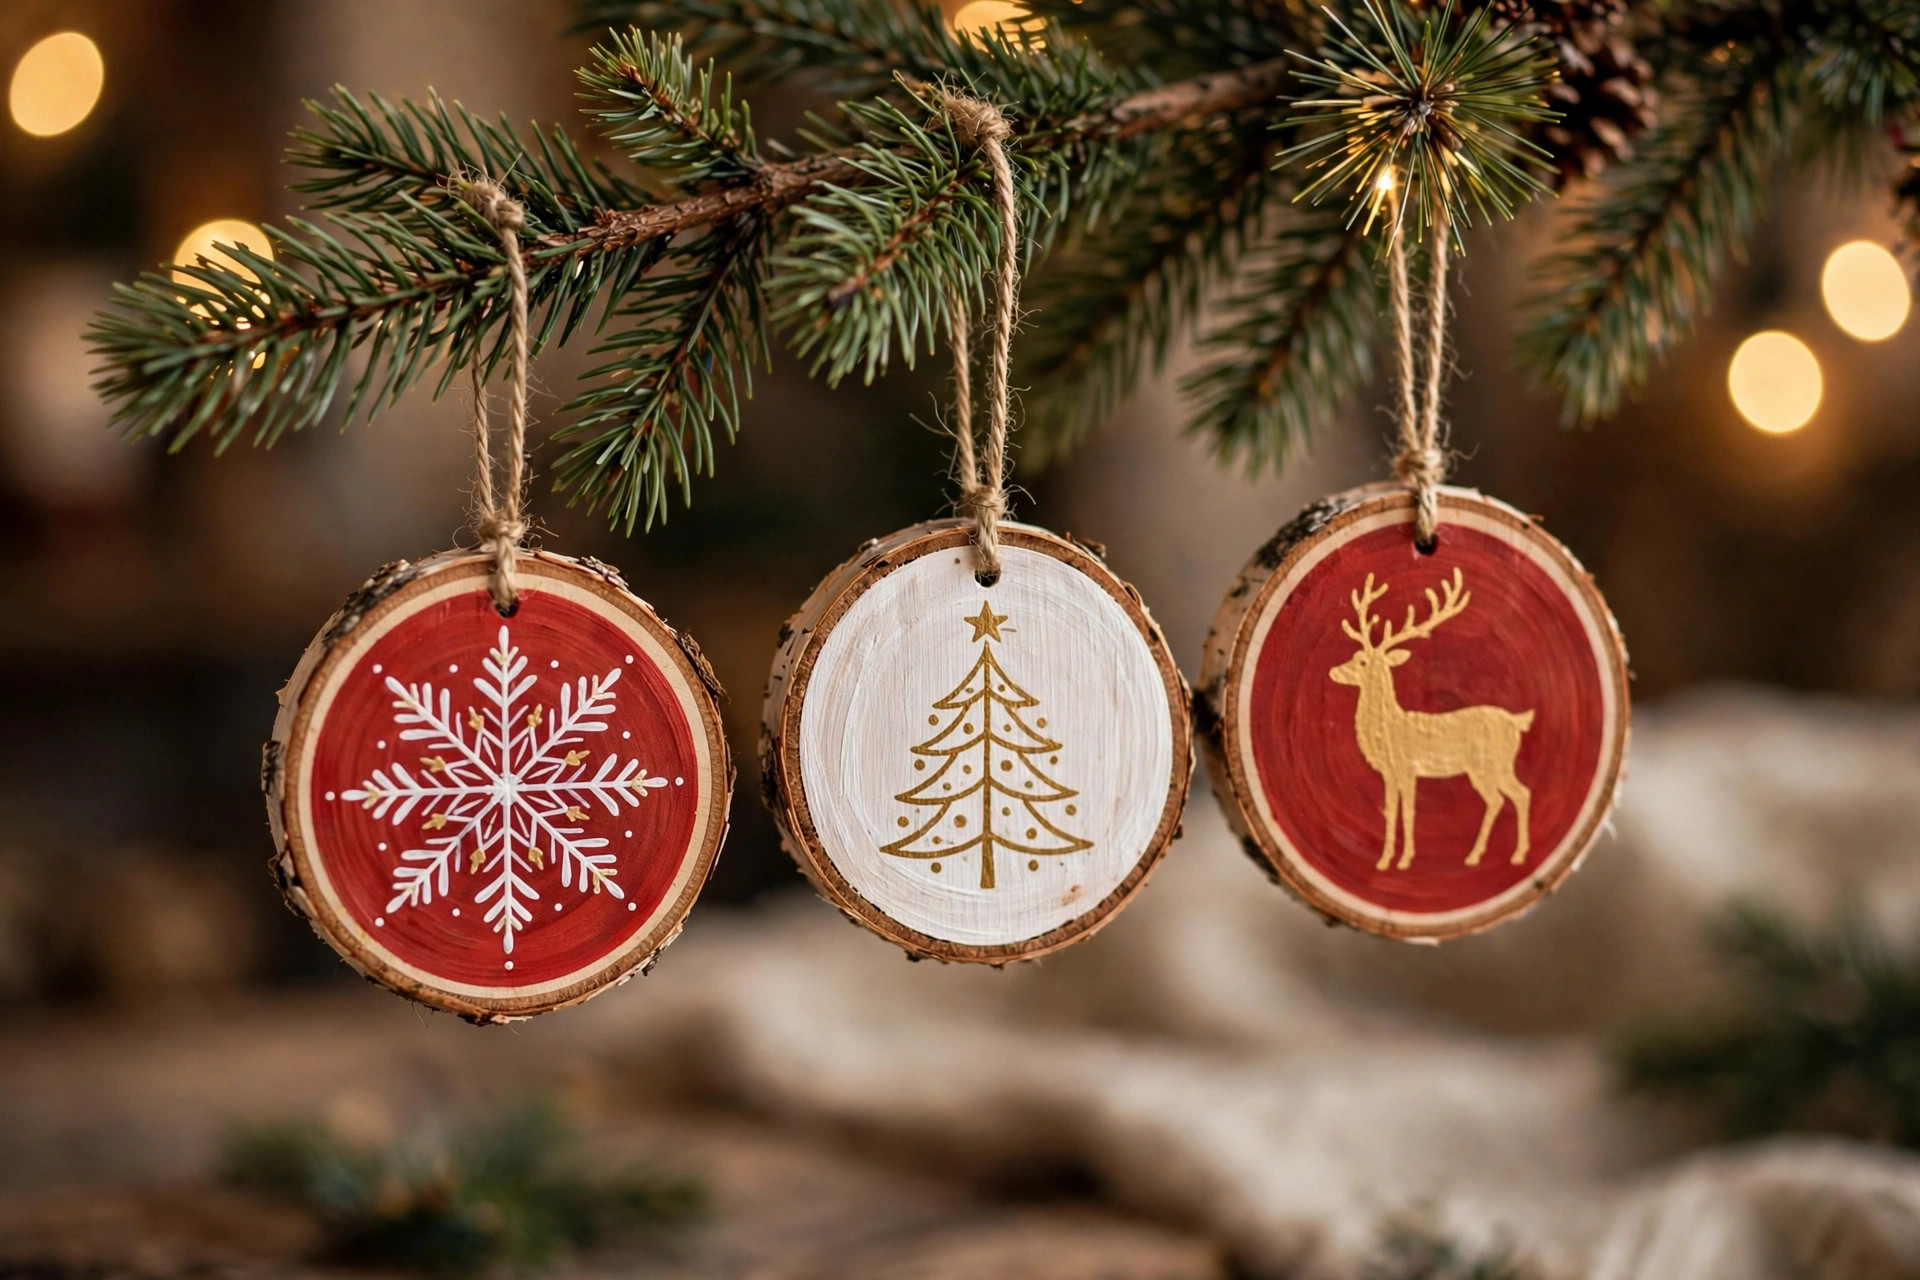

A slice of wood, cut thin and polished smooth, makes one of the finest ornaments on a Christmas tree. Wood slice ornaments for christmas crafts diy projects have grown dear to home makers for a simple reason. They are cheap to make, warm to look at, and open to any design a hand can paint or burn. A plain round of birch or pine can carry a name, a date, a snowflake, or a small painted scene. No two slices ever look the same. That is part of their charm. This guide walks through the whole craft, from choosing the wood to hanging the finished piece on the branch.
Why Wood Slice Ornaments Matter
Christmas ornaments carry more than decoration. They carry memory. A wood slice ornament holds a date of a child’s first Christmas, or the name of a new home, or a short word of hope painted in white on bark-edged wood. Unlike glass balls that shatter when they fall, a wood slice simply bounces. That makes it a sound choice for homes with small children and pets.
The craft also asks very little of the maker. A branch from the yard, a saw, a drill, some sandpaper, and a bottle of paint are enough to begin. A beginner can finish a first ornament in one afternoon and hang it the same evening.
Cost is another strong point. Store-bought ornaments of good quality often sell for several dollars each. A set of twelve homemade wood slice ornaments may cost less than one box from the shop.
The rustic look fits many styles of decor. Wood slices sit well on a farmhouse tree, a cabin tree, or a plain green tree with white lights. They also work as gift tags, wreath accents, and table scatter. One craft yields ornaments that serve many places through the season.
How to Choose Your Wood: Wood Slice Ornaments for Christmas Crafts Diy
The wood is the heart of the ornament. Choose it with care and the rest of the work goes smoothly.
Good Wood Choices
Birch is the favorite of many crafters. It has pale wood, fine grain, and bark that stays on well after drying. Pine is easy to find and easy to cut, though its grain is coarser and it may bleed sap if not dried fully. Oak and maple are harder; they take more work with the saw but give a fine, smooth face for detailed painting.
Fruit wood, such as apple or cherry, has warm color and takes paint nicely, but it tends to crack more than birch. Avoid very soft woods like cottonwood for thin slices, as they may split under the drill.
What Size to Cut
The classic ornament slice is between one quarter and one half inch thick. Thinner than a quarter inch, and the slice may warp as it dries or crack when drilled. Thicker than half an inch, and it grows heavy for hanging.
Diameter matters too. Two to four inches across is the common range. A three-inch slice gives room for a name and a small design while staying light on the branch.
Fresh Cuts Versus Dried Wood
Fresh-cut wood is easy to saw but must be dried before it is painted. A fresh slice will shrink as water leaves it, and the paint or burned design may crack with the wood. Small slices stacked with air space between them in a dry room need about one month per inch of thickness, so a half-inch slice needs roughly two weeks to a month.
Many makers buy pre-cut, kiln-dried slices from craft suppliers. These save the waiting time and crack less. For the home cutter, the rule is simple: cut in winter when sap is low and stack the slices out of direct sun.
Check Each Slice
Before you begin, look at every slice. Set aside any with deep cracks, soft spots, or insect holes. A hairline check on the edge is normal; a crack that runs across the face will show through paint and should go in the kindling pile.
Types and Options
Wood slice ornaments fall into a few broad kinds.
Plain Bark-Edged Slices
These are rounds cut straight from a branch, bark left on. The bark edge gives a finished frame to any painted design. They suit simple painted words, single-color stencils, and children’s handprints.
Sanded and Polished Slices
Some makers sand both faces smooth and strip the bark away for a clean wooden disc. These take fine detail well, such as burned line art. A disc without bark can be edge-painted in gold or red for a dressed-up look.
Pre-Drilled and Ready Blanks
Craft stores sell slices with a drilled hole and sometimes with a jute string already tied. These are the fastest path to a finished ornament. They cost more per piece than cutting your own, but for a large batch of gifts they save hours.
Wood Burned Slices
A wood-burning pen draws permanent designs with heat instead of paint. Names, dates, pine boughs, and snowflakes burned into birch look sharp and never flake. This method needs a steady hand and a well-ventilated room, but the results last as long as the wood. The patient hand it teaches also serves cross stitch for beginners well.
Painted and Decoupage Slices
Acrylic paint is the most common finish. It dries fast, covers well, and comes in every color. Decoupage, the gluing of paper napkins or printed images onto the wood, gives detailed pictures without painting skill. A heat gun for embossing can set raised embossing-powder designs on a sealed slice. A thin coat of sealer over the top keeps both methods safe from handling.
Tools and Supplies You Will Need
A short, plain list keeps the craft simple. Most of these items are already in many homes, and the rest are easy to find at a craft shop or hardware store.
– Branch or log, two to four inches in diameter, dried – Hand saw or miter saw for cutting slices – Sandpaper in 80, 150, and 220 grit – Drill with a small bit, one eighth inch or less, for the hanging hole – Acrylic craft paint and small brushes – Fine-tip permanent markers or paint pens for lettering – Wood-burning pen, if you want burned designs – Clear sealer, water-based polyurethane or craft varnish – Twine, jute string, or narrow ribbon for hangers – Soft cloth and a tack cloth for dusting
Look for craft wood slices and paints at Michaels, which carries blanks, paint sets, and sealers in one place. For saws, drills, and sandpaper, The Home Depot stocks everything a home cutter needs. Fine brushes and wood-burning pens are well served by Dick Blick, and JOANN offers ribbon, twine, and stencil sets for lettering.
Step by Step: Making the Ornaments
Work slowly and in good light. The craft rewards care more than speed.
Step 1: Cut the Slices
Mark the branch at even intervals with a pencil. A miter box helps keep cuts square. Cut with steady, even strokes and let the saw do the work. If you use a power saw, clamp the branch firmly and wear eye protection. Cut a few extra slices; some will crack in drying.
Step 2: Dry the Slices
Stack the slices in a single layer on a wire rack or on sticks that allow air to move under them. Keep them in a dry room away from heat vents and direct sun. Wait at least two weeks for half-inch slices, longer for thicker ones. Check by weight; a slice that still feels heavy for its size is still wet.
Step 3: Sand the Faces
Start with 80-grit paper to level the saw marks. Move to 150 grit, then finish with 220 grit for a smooth face that takes paint well. Sand in the direction of the grain. Wipe the dust away with a tack cloth. If you want the bark to stay on, sand the faces only and leave the bark edge alone.
Step 4: Drill the Hanging Hole
Mark a spot near the top edge, about a quarter inch from the bark. Drill slowly with a small bit. Back the slice with a scrap board so the bit does not tear the back face. A hole of one eighth inch takes twine or thin ribbon. For heavier ribbon, step up to three sixteenths.
Step 5: Paint or Burn Your Design
Sketch the design lightly in pencil first. Acrylic paint goes on best in thin coats; two thin coats cover better than one thick coat and crack less. For lettering, a paint pen gives cleaner lines than a brush for most beginners. If you wood burn, work on a heat-safe surface in a ventilated room and keep the pen moving.
Step 6: Seal the Work
Sealer protects paint from moisture and handling. Brush on a thin coat of water-based polyurethane or craft varnish, let it dry, and add a second coat. Seal both faces and the edge, but keep sealer out of the drilled hole so the string still threads easily.
Step 7: Add the Hanger and Hang
Cut twine or ribbon to about six inches, thread it through the hole, and tie a firm knot or bow. Hang the ornament and step back. Touch up any spot you missed. Your ornament is done.
For more rustic project ideas to pair with your ornaments, Family Handyman and This Old House both publish seasonal wood project guides. Bob Vila offers clear how-to articles on finishing and sealing small wood pieces.
Cost and Price
One of the plain joys of this craft is how little it costs.
| Item | Typical Cost | |—|—| | Branch from your own yard | Free | | Pack of 24 pre-cut dried slices | 8 to 15 dollars | | Acrylic paint set, 12 colors | 8 to 12 dollars | | Brush set | 5 to 8 dollars | | Water-based sealer, small can | 6 to 10 dollars | | Twine or ribbon roll | 3 to 5 dollars | | Sandpaper assortment | 4 to 6 dollars |
A maker who cuts from a yard branch and already owns paint can finish a dozen ornaments for under five dollars in new supplies. A maker who buys everything new may spend twenty-five to forty dollars for the first batch, but the tools and leftover paint serve many future projects.
Care and Upkeep
Wood slice ornaments last for decades when treated with a little care. Store them after the season in a dry box, wrapped in tissue or separated by paper so painted faces do not rub.
Dust them with a soft dry cloth before hanging each year. Twine hangers wear out before the wood does, so check each string yearly and replace any that look frayed.
Simple garden craft skills carry over nicely; a set of DIY garden markers uses the same cutting, sanding, and sealing steps on a larger scale.
Safety
This is a safe craft, but a few rules keep it that way.
Sawing and drilling call for eye protection. Clamp the branch or hold it in a vise; never hold small wood in your hand while a power tool runs. Keep fingers clear of the blade path and unplug the saw when changing blades.
Wood dust irritates lungs. Sand outdoors or wear a simple dust mask. This matters more with woods like walnut, whose dust bothers some people.
A wood-burning pen runs hot enough to brand skin and start a fire. Set it in its stand every time you set it down. Work on a non-flammable surface, keep paper and cloth away from the tip, and never leave the pen plugged in when you leave the room.
Keep small ornaments, loose string, and paint out of reach of toddlers. Paint and sealer should be used in a ventilated room and kept off skin; wash hands after the work. Store the wood-burning pen where children cannot reach it.
Frequently Asked Questions
How thick should wood slices be for ornaments?
Between one quarter and one half inch is best. Thinner slices warp and crack; thicker ones grow too heavy for the branch. A three-eighths inch slice is a good middle ground for most projects.
What kind of paint works on wood slices?
Acrylic craft paint is the standard choice. It sticks well to sanded wood, dries in under an hour, and cleans up with water. For outdoor ornaments, use an exterior acrylic or add an outdoor-rated sealer over the craft paint.
How do I stop wood slices from cracking?
Cut in winter when sap is low, seal the cut ends right away, dry slices slowly out of direct heat, and do not cut them too thin. Pre-dried blanks from a craft store crack the least. A hairline check on the edge is normal; a crack across the face means the slice should be set aside.
Can I use branches from my own yard?
Yes, and many makers do. Fruit trees, birch, maple, and pine from the yard all work. Strip loose bark, cut the slices, and dry them fully before painting. Avoid wood from trees treated with pesticides, and never take wood from parks or protected land without permission.
Do I need to seal the ornaments?
Sealing is strongly advised. An unsealed painted slice will pick up moisture from the air and the paint may lift over time. Two thin coats of water-based sealer add only minutes of work and add years of life.
How long does it take to make one ornament?
A plain painted ornament takes about one hour of hands-on work plus drying time between coats. A burned design may take two hours. Most makers work in batches of six to twelve, which is far more efficient than making one at a time.
A Short Final Word
Wood slice ornaments for christmas crafts diy work ask for little and give much. A branch, a saw, some paint, and an evening of quiet work become ornaments that outlast store-bought finery and carry the mark of the hand that made them. Start with a small batch this season. Paint the names of the people you love. Hang the first one yourself, and keep the sawdust out of the cocoa. The tree will be warmer for it.
For more background, see Target.
References
Blick Art Materials. (n.d.). Art and craft supplies. https://www.dickblick.com Bob Vila. (n.d.). Home improvement advice. https://www.bobvila.com Family Handyman. (n.d.). DIY home repair and maintenance. https://www.familyhandyman.com JOANN. (n.d.). Fabric and craft supplies. https://www.joann.com Michaels. (n.d.). Arts and crafts supplies. https://www.michaels.com Target. (n.d.). Retail store. https://www.target.com The Home Depot. (n.d.). Home improvement products. https://www.homedepot.com This Old House. (n.d.). Home renovation guidance. https://www.thisoldhouse.com
Was this guide helpful?

About Lisa Anderson
The My Garden US editorial team writes practical, in-depth home and garden guides for American homeowners — tested advice, no fluff.
You May Also Like

Best Modeling Clay for Kids Crafts Home: A Simple Buying Guide
September 6, 2026 0 views
Best Craft Cutting Mat for Rotary Cutters
June 18, 2026 0 views
DIY Friendship Bracelet Kit for Kids Crafts: A Parent’s Guide
May 30, 2026 0 views