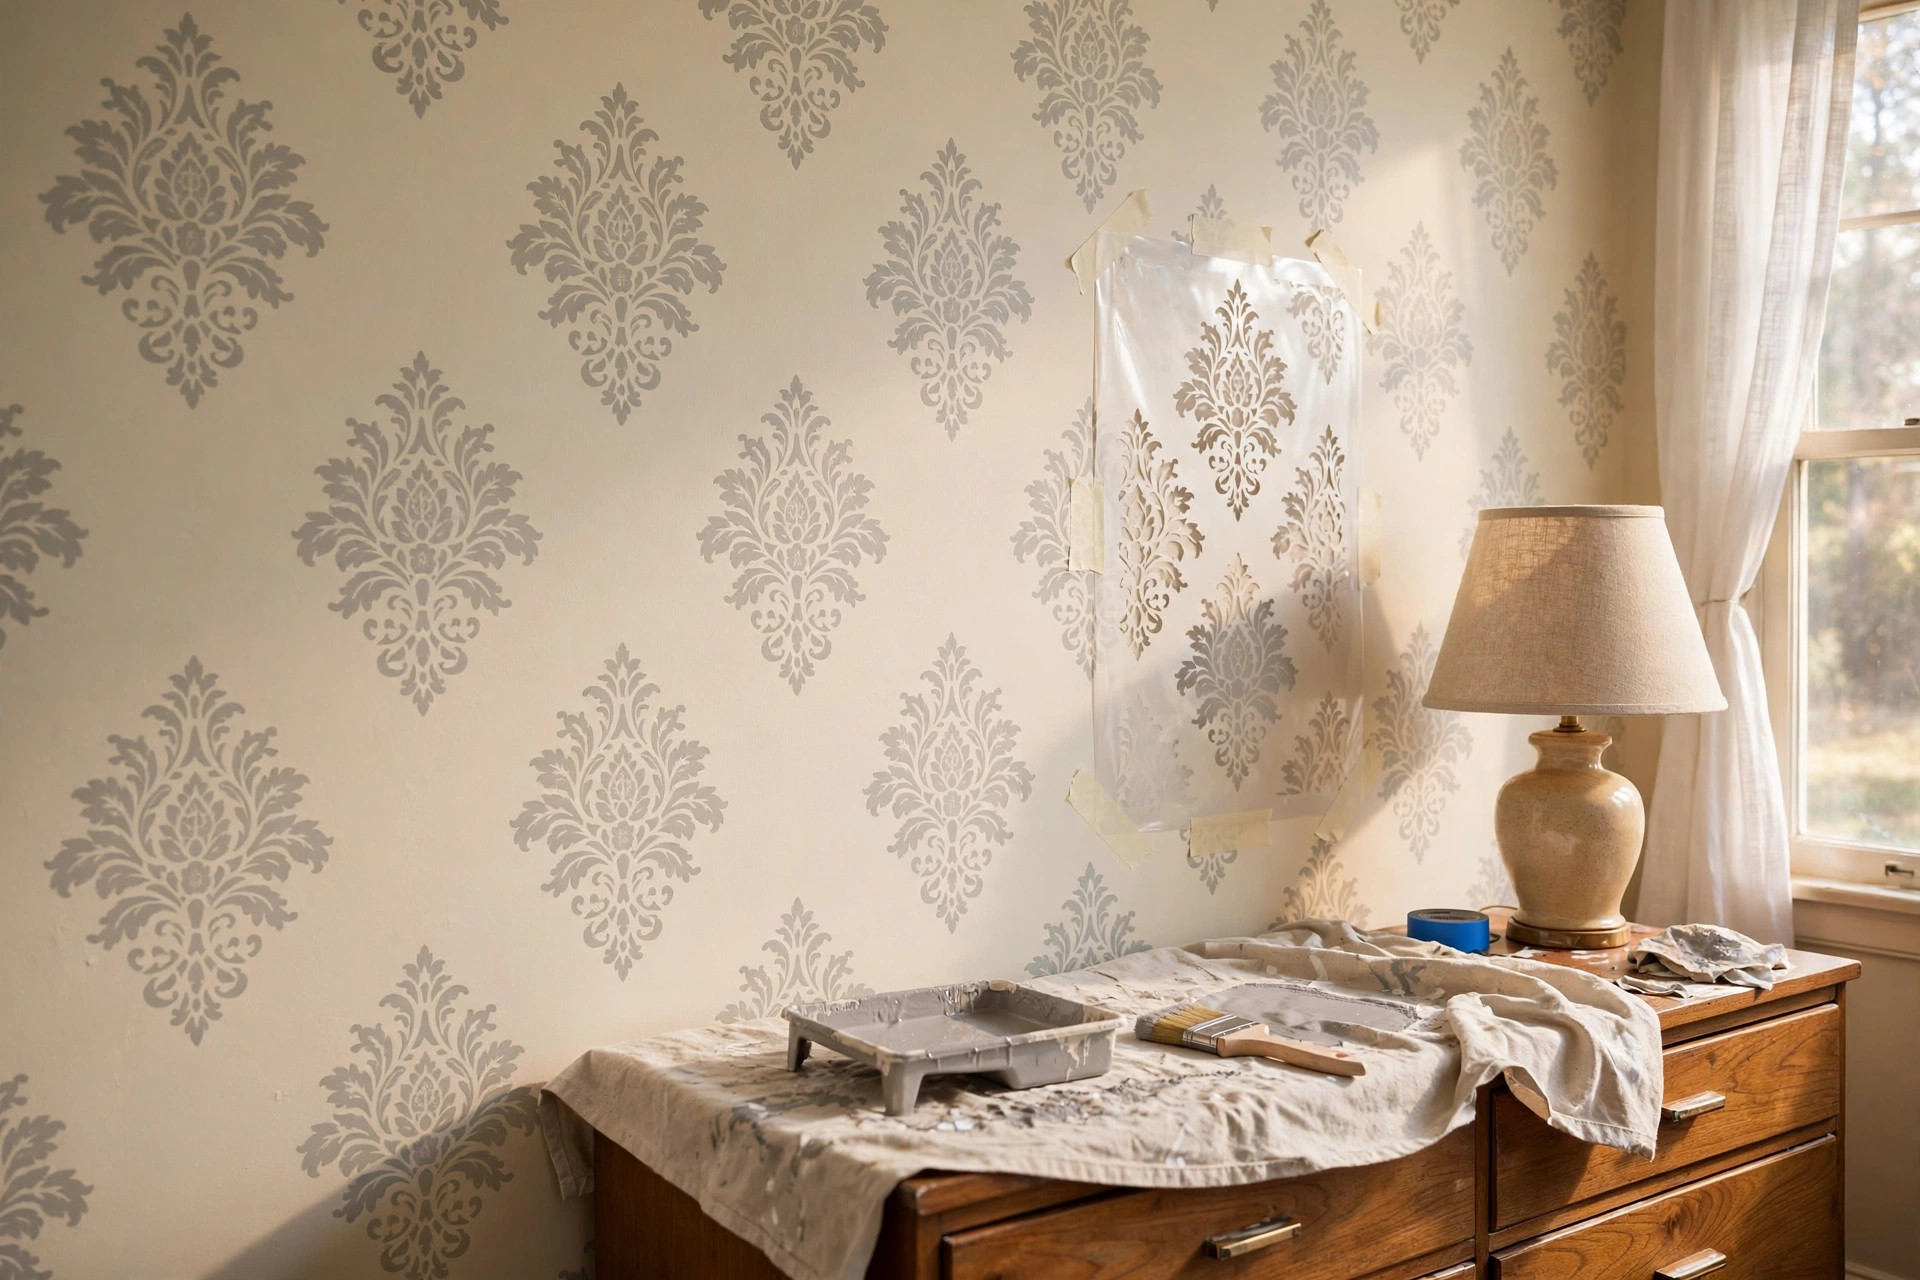

A stencil set for wall painting is one of the simplest tools in DIY home decor. It lets a plain wall carry a pattern, a border, or a full mural without the cost of wallpaper or the skill of a trained artist. The set is a group of cut sheets, each with a design open through the plastic. You lay the sheet on the wall, press paint through the openings, and lift it to find the design left behind. This idea is old. Painters used simple stencils long before modern craft stores existed. New sets are better made, with fine lines and repeat marks that line each pass up with the next.
For a homeowner who likes hand work, a stencil set for wall painting fits well into DIY home decor plans. A single afternoon can change a bedroom, a hall, or a front entry. Many people start with one accent wall, then move on to larger rooms.
Why a Stencil Set Is Worth Having
Wallpaper has its fans, but it is costly and hard to remove. Paint alone is cheap but plain. A stencil set sits between the two. It gives the rich look of a pattern at the price of a can of paint. When you tire of the design, you can paint over it in one coat. That freedom is a large part of its worth.
A good stencil set for wall painting also suits renters. Many leases forbid wallpaper but allow paint. A stenciled border or corner design can be painted over at move out time. The wall returns to plain white with no damage to the plaster. Landlords rarely object, though it is wise to ask first.
There is also the simple pleasure of the work itself. DIY home decor is about making a mark with your own hands. The work moves at a steady pace. It asks for care, not speed. The finished wall then carries proof of that quiet time.
How to Choose the Right Set: Stencil Set for Wall Painting Diy Home Decor
Craft stores carry many stencil sets. Think first about the wall you plan to paint, then match the set to that wall.
Sheet Size and Design Scale
Sheets the size of a letter page, or larger, suit broad walls. Small sheets suit borders, corners, and trim. The design should look right from the far side of the room. Hold the sheet up to the wall before you buy, if the store allows it, and judge the scale with your own eyes.
Most quality sets print repeat marks on the sheet edges. These marks let you line up the next pass so the pattern flows without breaks. Check for them. A set without repeat marks will force you to guess the spacing, and the guess will show.
Material of the Stencil
Thin plastic sheets, often called mylar, are the common choice. They bend around slight curves, wash clean, and last through many walls. Laser cut edges are a good sign. They give clean lines and fine detail. Cheap paper stencils tear and soak up paint. They may serve for a single small job, but they do not suit a full room.
Some sets include a sticky back. The light tack holds the sheet to the wall while you paint. This helps a beginner a great deal. If your set has no sticky back, painter tape and a light spray of repositionable adhesive will do the same work.
Paint and Tools to Pair With It
Acrylic craft paint suits small designs and single sheets. Latex wall paint suits full rooms and repeat patterns. The paint should be thick, not thin. Thin paint seeps under the sheet edge and blurs the design. A dense foam roller or a short, stiff stencil brush gives the best control. Art suppliers such as Dick Blick stock good ones. Apply the paint almost dry. Two light passes beat one heavy pass every time. Stores like Michaels and JOANN carry stencil sets side by side with the right brushes and rollers, so you can gather all you need in one trip. Paint makers such as Sherwin-Williams and Behr publish color charts that help with color choice, and the home guides at The Spruce and Bob Vila offer clear, tested steps for a beginner.
Common Types of Wall Stencil Designs
Stencil sets fall into a few broad families.
Allover patterns. These repeat one motif across the whole wall. Damask, trellis, stars, and small geometrics are common. They give the look of wallpaper. They take the most time but give the most change.
Borders and bands. A single strip runs along the top of the wall, around a door frame, or above a chair rail. Borders are quick and forgiving. A beginner should start here.
Corner and ceiling medallions. These sit in one spot, often above a bed or around a light fixture. They act like art on the wall.
Scene and mural sets. These build a picture from many sheets used in order, such as a tree with birds or a garden wall. They suit a child room or a garden porch.
Lettering and quotes. Word stencils place a short phrase on the wall. Keep the words few. A short line reads better than a long one.
Reusable wall stencils for painting are the best value for most people. A single set can serve three or four rooms before the edges wear. Wall stencil paint sets for beginners often bundle the sheets with a brush and a small paint tray, which removes the guesswork of buying tools apart. For pattern ideas beyond the set you own, the decor galleries at HGTV are worth a look.
Cost and Price
A stencil set for wall painting is one of the least costly projects in DIY home decor. A basic border set costs little. A large allover set with fine laser cutting costs more, but still far less than one roll of good wallpaper.
The paint is the next cost. For a border or an accent wall, a small jar of acrylic or a quart of latex is enough. For a full room in an allover pattern, plan on a gallon of base paint and a quart of stencil paint. Tools add a little more: a foam roller, a stencil brush, painter tape, and a tray. The Home Depot site lists these basics with prices, which helps you plan the full cost before you start.
Set a small budget on paper before you shop. Write down the set, the paint, and the tools. This keeps the project honest and stops the small extra buys that creep into craft trips.
How to Use a Stencil Set, Step by Step
The method is simple, but order matters. Follow these steps and the design will come out clean.
1. Prepare the wall. Wash the wall with mild soap and water. Let it dry fully. Fill small holes and sand them smooth. If the base coat is old or stained, roll on a fresh base coat and let it cure for a day. Paint sticks best to a clean, dry wall.
2. Plan the layout. Mark the center of the wall with light pencil lines. For an allover pattern, start at the center and work outward, so cut edges fall at the corners. For a border, mark a level line with a spirit level.
3. Fix the stencil. Tape the sheet at the top corners with painter tape. Step back and check that it sits level. For large sheets, add tape at the bottom corners too. Work on one section at a time.
4. Load the brush or roller lightly. Dip the tool, then roll or pounce most of the paint off onto a paper towel or tray. The tool should feel almost dry. This is the most important habit in stenciling. Too much paint is the cause of nearly every blurry edge.
5. Apply with a pouncing motion. For a brush, press straight up and down. Do not sweep side to side. For a roller, roll gently with light pressure. Build the color in two thin passes, letting the first dry for a few minutes.
6. Lift and check. Peel the sheet back slowly while the paint is still slightly wet. Look at the design. If the edges are clean, move the sheet to the next spot, using the repeat marks to line it up.
7. Touch up. Keep a small artist brush and the base wall color close by. A tiny slip can be fixed with a dab of base paint. Small fixes vanish once the wall is viewed from a normal distance.
Decorative stencil designs for bedroom walls often use soft, calm colors. A tone just two steps darker than the wall gives a quiet pattern that suits rest. Bolder contrast suits a hall or a playroom. Test your colors on a hidden patch or a board before you commit to the wall.
Care and Upkeep of Your Stencil Set
A stencil set can last for years if you treat it with mild care. Wash each sheet in warm water with a drop of dish soap as soon as you finish a session. Do not let paint dry on the sheet. Dried paint stiffens the plastic and roughens the cut edges. Lay the sheets flat to dry on a towel. Never fold them, since a crease will leave a line in every future design.
Store the dry sheets flat in a large envelope or between sheets of wax paper. Keep them away from heat. A hot attic can warp thin plastic. With this care, a good set will serve many rooms.
Craft storage matters for the whole hobby, not just stencils. If your supplies are growing, the ideas in our guide to best craft storage for small craft room ideas can help you keep brushes, paints, and sheets in order. A tidy craft corner makes the next project start faster.
Safety
Wall stenciling is a safe craft, but a few plain cautions apply. Work in a room with fresh air moving through it. Open a window or run a fan. Paint fumes are mild with latex and acrylic, but steady air is still wise. Wear old clothes and keep paint away from eyes.
If your home was built before 1978, the old paint under your work may contain lead. Do not sand or scrape old paint without checking first. The U.S. Consumer Product Safety Commission publishes guidance on lead paint safety in the home, and it is worth reading before you touch an older wall. When in doubt, paint over the old surface without sanding, or call a local lead inspector.
Keep small paint jars and sharp craft knives out of the reach of young children. Wash your hands when you finish. These are small steps, but they keep a pleasant project pleasant.
Frequently Asked Questions
Can a beginner use a stencil set for wall painting? Yes. Stenciling is one of the kindest crafts for a beginner. The sheet does the drawing for you. Start with a border set and a simple two color design. Practice on a board or a closet wall first. Your third or fourth pass will look far better than your first.
How do I stop paint from bleeding under the stencil? Use less paint than you think you need. The brush or roller should feel nearly dry. Press straight down instead of sweeping. Tape the sheet flat so no edge lifts. Thick paint helps too. Most bleeding comes from a loaded brush, not from a bad stencil.
Can I stencil over textured walls? Light texture takes a stencil well if you press the sheet firmly and use a nearly dry brush. Heavy texture will break the design lines, so choose a bold, simple motif with thick lines.
How do I clean a stencil between colors? Rinse the sheet in warm water right away. A soft sponge lifts wet paint without harming the cut edges. For dried paint, soak the sheet for ten minutes, then rub gently. Never use a wire brush or strong solvent on a plastic stencil.
Will the design survive washing the wall later? Yes, if you used quality latex or acrylic paint and let it cure for two to three weeks. Wash the wall gently with a soft cloth. Hard scrubbing can wear any paint, stenciled or not.
What other DIY crafts pair well with stenciled walls? A finished room invites more handmade touches. Some people move on to a leather crafting tools kit for beginners to make small goods for the room, or spend a quiet evening with a wooden puzzle kit for adults once the paint is dry.
A Short Final Word
A stencil set for wall painting earns its place in DIY home decor. It is cheap, it is forgiving, and it puts a personal mark on a room in a single weekend. Choose a set that fits your wall, keep your brush nearly dry, and let the pattern grow one pass at a time. The wall you finish will carry your hand in every line, and that is the whole point of doing it yourself.
References
Behr. (n.d.). Paints, primers, and stains. https://www.behr.com Blick Art Materials. (n.d.). Art and craft supplies. https://www.dickblick.com Bob Vila. (n.d.). Home improvement advice. https://www.bobvila.com HGTV. (n.d.). Home and garden ideas. https://www.hgtv.com JOANN. (n.d.). Fabric and craft supplies. https://www.joann.com Michaels. (n.d.). Arts and crafts supplies. https://www.michaels.com Sherwin-Williams. (n.d.). Paints and coatings. https://www.sherwin-williams.com The Home Depot. (n.d.). Home improvement products. https://www.homedepot.com The Spruce. (n.d.). Home and garden advice. https://www.thespruce.com U.S. Consumer Product Safety Commission. (n.d.). Product safety information. https://www.cpsc.gov
Was this guide helpful?

About Jennifer Lee
The My Garden US editorial team writes practical, in-depth home and garden guides for American homeowners — tested advice, no fluff.
You May Also Like

The Best Yarn for Baby Blankets: Soft, Washable Choices That Last
April 25, 2026 0 views
DIY Soap Dispenser Kit for Bathroom Crafts: A Complete Guide
August 14, 2026 0 views
A DIY Keychain Kit for Resin and Crafts Gifts: A Complete Guide
June 20, 2026 0 views