
Photo: Wikimedia Commons
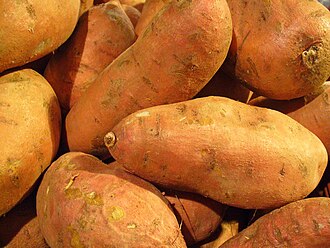
Sweet potatoes are pure summer — sprawling vines, heart-shaped leaves, and underneath, the sweet orange roots that define holiday tables. They are not related to regular potatoes at all; they are tropical morning glories that demand heat and a long season, and they repay it with heavy yields from a small bed. The two secrets beginners miss: grow from slips (rooted sprouts), never seeds or tubers, and cure the harvest — uncured sweet potatoes taste starchy and bland. Learning how to grow sweet potatoes means embracing heat: black plastic, the sunniest spot, and patience. The USDA PLANTS entry for Ipomoea batatas confirms its tropical, heat-loving nature. This guide covers slips, planting through plastic, watering restraint, and the all-important cure. For a quick botanical overview, see the USDA PLANTS entry for Ipomoea batatas.
Choosing a Variety
Beauregard is the standard orange type — reliable, sweet, and widely available as slips. Covington resists disease and stores well; Jewel and Garnet are Southern favorites. For short seasons, choose the earliest-maturing variety you can find and start slips indoors. Order slips from a supplier (they ship at planting time) or sprout your own from a store sweet potato suspended in water — the Old Farmer’s Almanac guide to sweet potatoes describes both methods. You need about 90 frost-free days after planting, so count backward from your first fall frost and be honest about your season.
When and How to Plant
Timing your sowing
Start sweet potatoes indoors about 6 weeks before your last spring frost. Use small pots or cell packs and keep them warm and bright; sweet potatoes resent having their roots disturbed, so pot up promptly if seedlings outgrow their cells. Transplant about 4 weeks after your last spring frost, when the soil has truly warmed. Seeds are tiny, so cover them only about 3 inch deep and keep the mix evenly moist until they sprout.
Spacing, depth, and days to harvest
From sowing to harvest takes roughly 90 to 120 days, so you can count forward from your planting date and know about when to start watching.
If you start seeds indoors, harden the seedlings off for a week before transplanting — a few hours of outdoor shade the first day, building to full sun. Skipping this step shocks tender plants and sets them back two weeks.
Frost-date charts from a ZIP-code planting calendar help if you are new to reading your zone.
Soil and Sun
Light needs
Sun is non-negotiable: aim for a spot that stays lit from mid-morning on. Shade-grown plants disappoint.
Building good soil
For soil, aim for warm, sandy, well-drained soil. Work in a few inches of compost before planting; it loosens heavy ground and feeds sandy ground in one move.
It is rated for zones 5 to 11. Outside that range, treat it as an annual or grow it in containers you can move with the seasons.
Mulch after planting with two to three inches of straw, shredded leaves, or bark. Mulch holds moisture, smothers weeds, and feeds the soil as it breaks down — it is the single easiest upgrade to any planting.
Soil testing labs listed through the University of Minnesota Extension can confirm your pH before you plant.
Watering and Feeding
Watering routine
Go easy with the hose. This plant tolerates drought far better than wet feet, so water only when the soil is truly dry.
Feeding
Avoid high-nitrogen fertilizer entirely — it grows enormous vines with skinny roots. Go light on fertilizer. Compost worked in at planting plus a mid-season mulch feeding will carry it; overfeeding causes more problems than it solves.
Morning watering is the rule: leaves dry fast in rising sun, denying fungal diseases the damp nights they love. Drip irrigation or a soaker hose waters roots without wetting leaves at all.
Irrigation basics from Clemson’s Home & Garden Information Center apply to all of these schedules.
Care Through the Season
Through the season, water well until established, then ease off — too much water and fertilizer grows enormous vines with skinny roots, the classic disappointment. Lay black plastic before planting to warm the soil and bank heat; in marginal zones it makes the difference between a crop and a failure. Mulch to suppress weeds while vines fill in. Sweet potatoes have few serious pests; watch for wireworms in the roots and flea beetles chewing foliage. Avoid high-nitrogen fertilizer entirely. UF/IFAS Gardening Solutions has warm-climate sweet potato notes for Southern growers. The vines root where they touch soil — lift them occasionally if you want all energy in the main roots.
Companions and Placement
Sweet Potato shares the vegetable bed happily with Potato, Tomato, and Okra — all want the same sunny, fertile ground and similar watering. Think in families when you plan: follow heavy feeders like corn with light feeders like beans, which return nitrogen to the soil, and never plant the same family in the same bed two years running. Good air flow between rows matters as much as good neighbors; crowded beds stay damp and disease follows damp. Tuck quick crops like radishes between slow ones to use every inch, and keep a path wide enough for a wheelbarrow — you will thank yourself at harvest time.
Harvest
Harvest before soil temperatures drop — a frost-killed vine is the signal to dig promptly. Lift carefully with a fork; nicked roots rot in storage. Then cure: one to two weeks in warm, humid conditions (around 80°F with high humidity), which converts starches to sugars and heals nicks — the Missouri Botanical Garden plant finder emphasizes that curing is what makes them sweet. After curing, store warm, around 55 to 60 degrees — never refrigerate, which ruins texture and flavor. Properly cured sweet potatoes keep for months and taste better after a few weeks in storage.
Troubleshooting
All vines and no roots means too much nitrogen or too much water — cut both and let the plants stress slightly. Small roots at season’s end usually mean planting too late or too cool; black plastic and earlier slips fix it next year. In zones below 5, the season is simply too short — the USDA National Agricultural Library‘s resources confirm the 90-plus-day need. Wireworm holes are cosmetic; peel and use. If frost hits before harvest, dig immediately — cold-damaged roots rot fast. Soft spots in storage mean nicks or poor curing; handle gently and cure thoroughly.
Through the Seasons
Spring
In spring, the work is soil and timing. Work compost into the bed as soon as the ground can be turned, and sow or transplant on the schedule above — sweet potatoes planted at the right moment outgrow everything planted late. A floating row cover over new sowings adds a few degrees of warmth and keeps flea beetles off; pull it once plants flower so pollinators can reach them.
Summer
Summer is maintenance season: water deeply through dry spells, weed before weeds set seed, and watch for the pests listed above. For sweet potatoes, the harvest window is the busy season — pick often, because timely picking keeps plants producing. A mid-season side-dress of compost keeps heavy feeders happy. In heat waves, an extra evening watering saves stressed plants.
Fall and Winter
In fall, pull spent plants, compost the healthy foliage, and sow a cover crop or mulch the empty bed — bare winter soil loses nutrients to rain. Clean and oil tools before storing, and jot down what worked; next spring’s planting plan starts with this fall’s notes.
Quick Answers
How long until I can harvest sweet potatoes?
About 90 to 120 days from sowing to harvest under good conditions — count forward from your planting date to know when to start watching.
Where will sweet potatoes grow?
Zones 5 through 11. Inside that range it is hardy and reliable; outside it, grow as an annual or in containers.
Does sweet potatoes need full sun?
Full sun. Give it the sunniest spot you have; shade-grown plants disappoint.
What spacing does sweet potatoes need?
About 12 inches apart. Crowding stunts plants and invites disease, so give each one its room — the harvest is bigger, not smaller, for the space.
Using the Harvest
Cure them properly and baked sweet potatoes need nothing but butter — the curing converts starches to sugars and makes all the difference. They roast into caramelized wedges, mash with chipotle, fry into chips, and bake into the classic pie. Store cured roots at 55 to 60 degrees, never refrigerated, and they keep for months, improving in flavor for weeks. Save a few roots to sprout next spring’s slips. The vines’ young leaves are edible too, cooked like spinach in many cuisines — a bonus crop most gardeners never try. Browse more plant profiles at Gardenia.net’s plant profiles for ideas.
Keep Growing
How to grow sweet potatoes: slips in warm soil through black plastic, ease off water and nitrogen, dig before cold, cure warm and humid. The cure is the step everyone skips and no one should. For planting dates, check your USDA zone planting dates and fill the heat-loving bed with our guides to how to grow potatoes, how to grow tomatoes, and how to grow okra — fellow sun-worshippers.
References
- Old Farmer’s Almanac. (n.d.). Growing sweet potatoes in home gardens. https://www.almanac.com/
- U.S. Department of Agriculture. (n.d.). Sweet Potato (Ipomoea batatas) plant profile. https://plants.usda.gov/home
- University of Minnesota Extension. (n.d.). Growing sweet potatoes in home gardens. https://extension.umn.edu/
- Clemson University Cooperative Extension. (n.d.). Home & Garden Information Center. https://hgic.clemson.edu/
Was this guide helpful?

About My Garden US
The My Garden US editorial team writes practical, in-depth home and garden guides for American homeowners — tested advice, no fluff.