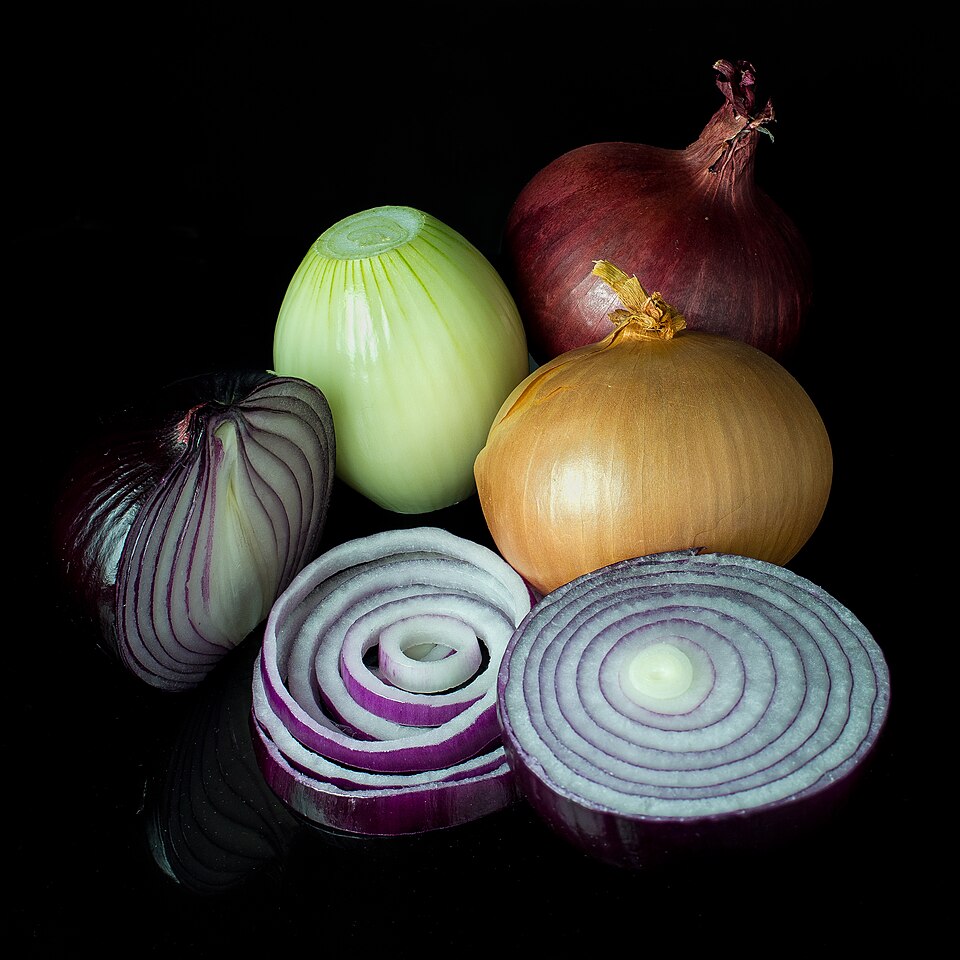


Photo: Wikimedia Commons

Onions are the backbone of cooking and one of the most satisfying crops to pull from your own ground — a braid of home-cured onions hanging in the pantry is a gardener’s trophy. They are not difficult, but they have one non-negotiable rule that trips up beginners: day length. Onions bulb in response to daylight hours, so the variety must match your latitude or you get scallions instead of bulbs. Learning how to grow onions means learning that rule, then giving them sun, loose soil, and ruthless weeding. The USDA PLANTS entry for Allium cepa confirms its adaptability across zones 3 to 10. This guide covers sets versus seed, day-length types, watering and the crucial dry-down, curing, and storage. For a quick botanical overview, see the USDA PLANTS entry for Allium cepa.
Choosing a Variety
Match day length to your latitude: long-day types for the North (Walla Walla, Patterson, Redwing), short-day for the South (Texas Grano, Granex, Red Creole), intermediates like Candy in between. The wrong type never bulbs properly — this is the entire secret, as the Old Farmer’s Almanac guide to onions stresses. Start from sets (fastest, most foolproof), transplants, or seed (cheapest, widest choice). Sets go out about four weeks before the last spring frost; they are simply the easiest path to big bulbs. For storage onions, choose firm, pungent varieties; sweet types like Walla Walla eat wonderfully fresh but store poorly.
When and How to Plant
Timing your sowing
Start onions indoors about 8 weeks before your last spring frost, in a bright cool spot. Trim the tops to three inches if they flop. Set the young plants out about 4 weeks before your last spring frost — onions are hardy and prefer an early start; sets can go out at the same time. Plant about 0.5 inch deep and 4 inches apart in loose, fertile ground.
Spacing, depth, and days to harvest
From sowing to harvest takes roughly 90 to 120 days, so you can count forward from your planting date and know about when to start watching.
Harden off indoor-started seedlings over seven to ten days, lengthening their outdoor time gradually. Plants moved straight from windowsill to garden stall out, while hardened ones take off running.
Frost-date charts from a ZIP-code planting calendar help if you are new to reading your zone.
Soil and Sun
Light needs
It wants full sun — six to eight hours of direct light a day. Less than that and growth turns leggy and yields fall off.
Building good soil
For soil, aim for fertile, well-drained soil. Work in a few inches of compost before planting; it loosens heavy ground and feeds sandy ground in one move.
Hardy in zones 3 through 10, it fits most of the country. If you garden at the cold edge of the range, a sheltered microclimate near a wall buys you a few degrees of safety.
Mulch after planting with two to three inches of straw, shredded leaves, or bark. Mulch holds moisture, smothers weeds, and feeds the soil as it breaks down — it is the single easiest upgrade to any planting.
Soil testing labs listed through the University of Minnesota Extension can confirm your pH before you plant.
Watering and Feeding
Watering routine
Aim for steady moisture: water when the top inch of soil dries out, and mulch to keep it from swinging between soaked and parched.
Feeding
Feed with nitrogen early for leaf growth; leaves make the bulb, so lush tops mean big onions — but stop feeding once bulbing starts. Go light on fertilizer. Compost worked in at planting plus a mid-season mulch feeding will carry it; overfeeding causes more problems than it solves.
Water in the morning so foliage dries by evening — wet leaves overnight invite disease. A rain gauge, or even a tuna can set out in the rain, tells you how much fell; adjust the hose accordingly.
Irrigation basics from Clemson’s Home & Garden Information Center apply to all of these schedules.
Care Through the Season
Through the season, keep beds meticulously weed-free — onions have shallow roots and lose every competition with weeds, and a weedy bed means marble-sized bulbs. Water steadily until the tops begin to fall over, then stop watering entirely to let bulbs cure in the ground; continued watering at that stage causes rot in storage. Watch for onion maggots and thrips; rotate beds yearly and use row cover against maggot flies. Never hill soil over the bulbs — unlike potatoes, onions bulb best with shoulders exposed to sun. Clemson’s Home & Garden Information Center has Southern onion timing charts. Feed nitrogen early while tops are growing; once bulbing starts, the plant is done with feeding.
Companions and Placement
In a mixed vegetable patch, onions sit comfortably beside Garlic, Leek, and Carrot. Match water needs when you lay out rows — thirsty corn should not share a bed with drought-tough herbs. Feed the soil between plantings with compost, and let a cover crop rest any bed that finishes early. Tall crops go on the north side so they never shade short ones. And label everything at planting time; by midsummer, every seedling looks alike and every gardener swears they will remember.
Harvest
Harvest when tops yellow and flop over — about half the tops down is the signal. Lift gently with a fork, then cure two to three weeks in a dry, airy, shaded spot until the necks are papery and tight; the Missouri Botanical Garden plant finder emphasizes that thorough curing is what makes onions store. Braid only fully cured bulbs, or bag them in mesh, and store cool, dark, and dry — never in the fridge, where humidity wakes them up. Well-cured storage types keep for months. Eat any thick-necked bulbs first; they will not store.
Troubleshooting
No bulbs, just green tops, means the wrong day-length type for your latitude — the classic beginner mistake, fixed by buying the right type next year. Small bulbs usually mean weeds won the competition or water stopped too early. Soft rot in storage traces back to incomplete curing or watering too late; the USDA National Agricultural Library indexes extension guides on curing technique. Maggot-damaged plants wilt and pull up easily — rotate crops and cover with row fabric. If tops flop but necks stay thick and green, wait; harvesting too early gives poor storage. Bolting (flowering) follows cold stress on young plants; snap off flower stalks and use those bulbs first.
Through the Seasons
Spring
Spring is for preparation and planting. Loosen the bed, mix in compost, and get onions in the ground when the soil — not the calendar — says ready. Label every row at planting time; by midsummer all seedlings look alike. Water new plantings gently but thoroughly, and mulch once they are a few inches tall to lock in the spring moisture.
Summer
Through summer, keep the water steady and the harvest coming. Onion does its heaviest work in the warm months, so do not let weeds steal its water or let pests build up unnoticed. Mulch keeps roots cool when the sun is fierce. Sow succession crops in gaps as early plantings finish — bare summer soil is a wasted opportunity and a weed invitation.
Fall and Winter
As the season winds down, harvest the last of the onions before hard frost, then clear the bed. Compost disease-free foliage and trash the rest. A blanket of shredded leaves over the empty bed protects the soil all winter. Order next year’s seed early — popular varieties sell out by planting time.
Quick Answers
How long until I can harvest onions?
About 90 to 120 days from sowing to harvest under good conditions — count forward from your planting date to know when to start watching.
Where will onions grow?
Zones 3 through 10. Inside that range it is hardy and reliable; outside it, grow as an annual or in containers.
Does onions need full sun?
Full sun. Give it the sunniest spot you have; shade-grown plants disappoint.
What spacing does onions need?
About 4 inches apart. Crowding stunts plants and invites disease, so give each one its room — the harvest is bigger, not smaller, for the space.
Using the Harvest
Cure onions thoroughly and the storage types keep for months in a cool, dark, dry spot — braided strings hanging in the pantry are as practical as they are handsome. Sweet types like Walla Walla are for eating fresh: thick slices on burgers, in salads, and caramelized low and slow until jammy. Use thinnings as green onions all season; nothing goes to waste. Dehydrate sliced onions for powder, or freeze chopped onions for cooking — they go straight from freezer to pan. Save the biggest, best-cured bulbs for eating and plant the rest next season’s sets. Browse more plant profiles at Gardenia.net’s plant profiles for ideas.
Keep Growing
How to grow onions that actually bulb: right day-length type for your latitude, full sun, zero weeds, water until tops flop, then cure thoroughly. Get those right and the pantry fills itself. For planting dates, check your USDA zone planting dates and round out the allium bed with our guides to how to grow garlic, how to grow leeks, and how to grow carrots — the classic row-mates.
References
- Old Farmer’s Almanac. (n.d.). Growing onions in home gardens. https://www.almanac.com/
- U.S. Department of Agriculture. (n.d.). Onion (Allium cepa) plant profile. https://plants.usda.gov/home
- University of Minnesota Extension. (n.d.). Growing onions in home gardens. https://extension.umn.edu/
- Clemson University Cooperative Extension. (n.d.). Home & Garden Information Center. https://hgic.clemson.edu/
Was this guide helpful?

About My Garden US
The My Garden US editorial team writes practical, in-depth home and garden guides for American homeowners — tested advice, no fluff.
You May Also Like
Organic Herb Seeds Where to Buy USA: A Plain Guide for the Home Gardener
August 19, 2026 1 views
How to Grow Coneflowers: A USA Beginner’s Guide
October 8, 2026 3 views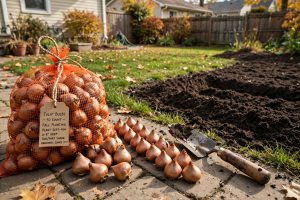
Tulip Bulbs Fall Reviews Buying Guide USA
March 24, 2026 1 views