A pellet grill is one of the finest tools a backyard cook can own. It burns small wood pellets to make steady heat and rich smoke. It can grill, smoke, roast, and bake with one turn of a dial. But it asks for one thing in return. You must learn how to clean pellet grill after use the right way. A dirty grill cooks uneven food. It can catch fire from built-up grease. It can also stop feeding pellets and shut down in the middle of a long cook. This guide gives you a plain, step-by-step routine that takes about fifteen minutes. Follow it after every cook, and your grill will last for years.
Why Cleaning Matters So Much
Ash is the other problem. When ash builds up, air cannot flow. The flame grows weak. The grill swings in temperature. Meat cooks slow on one side and fast on the other.
Grease is the bigger danger. Drip pans and trays collect fat from brisket, ribs, pork shoulder, and chicken. If you leave that grease, it turns rancid and gives the next meal a bitter taste. Worse, pooled grease can ignite. Grease fires in pellet grills are rare but real, and most start because the owner skipped cleaning. The team at Traeger tells owners to clean the drip system often for this very reason.
There is also the matter of flavor. Old ash and charred bits stick to the grates. They leave a sour, stale note on fresh food. A clean grill gives you clean smoke. Clean smoke is the whole point of owning a pellet grill. If you plan to cook long sessions like the ones described in our guide on how to smoke brisket on a pellet grill, a clean start is not optional. It is the base of good results.
What You Need Before You Start: How to Clean Pellet Grill After Use
You do not need costly gear. Most of what you need is already in a home shop or garage. Gather these tools before the grill cools too much.
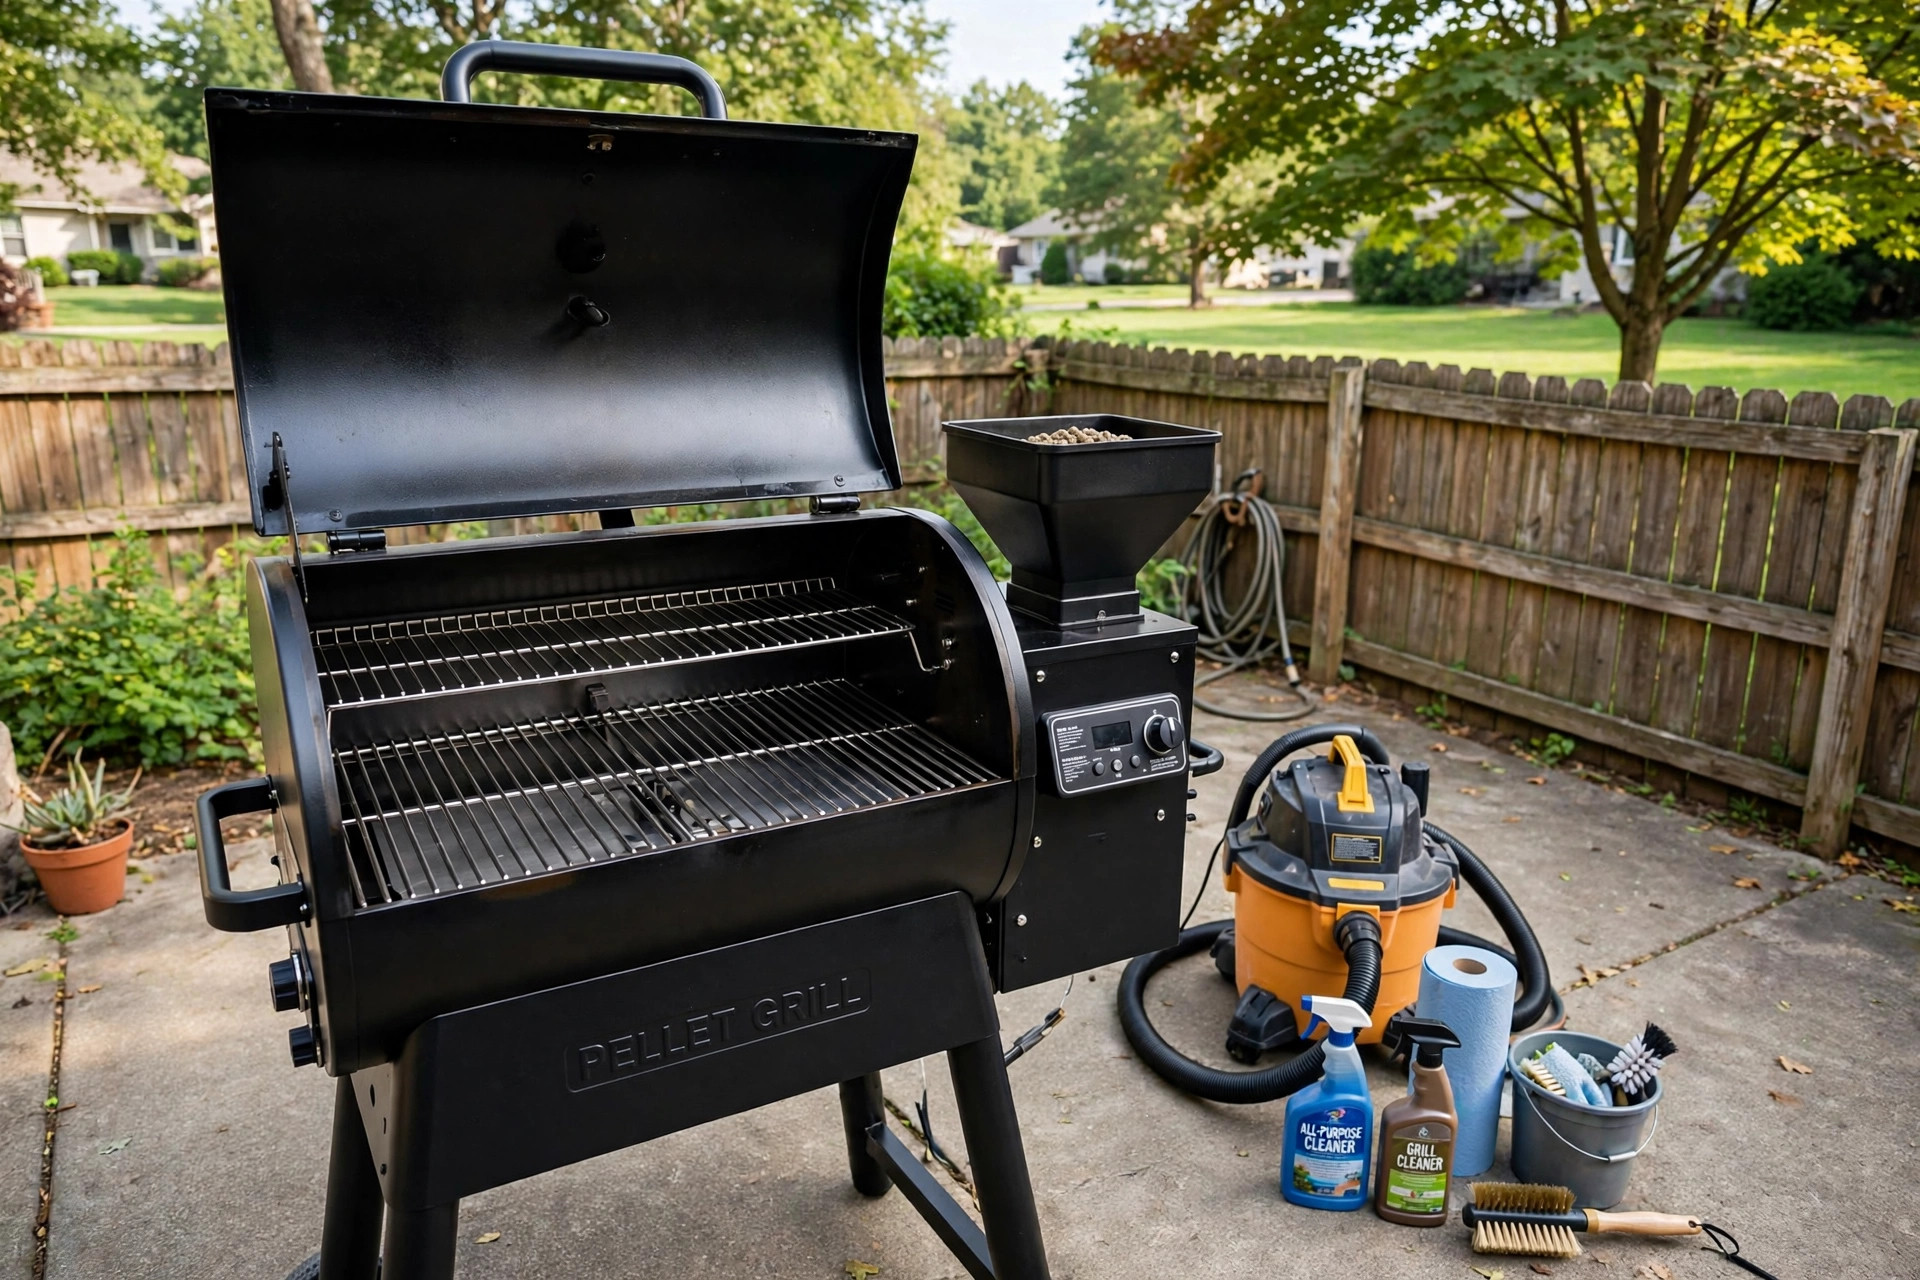
– A shop vacuum or a small ash vacuum for fine ash. – A sturdy grill brush with brass or stainless bristles, or a wooden scraper. – A plastic putty knife for scraping the drip tray. – Heavy-duty paper towels or clean shop rags. – A bucket of warm water with mild dish soap. – A spray bottle of simple degreaser safe for grills. – Heat-resistant gloves. – A metal can with a lid to hold old grease and foil.
Avoid harsh oven cleaners with lye on painted or powder-coated parts. They can dull the finish. Plain soap, water, and a good brush handle most jobs. Weber and Char-Broil both sell brushes and scrapers made for grill grates.
Do not clean while the grill is fully hot. Start when the grill has cooled to warm, about 100 to 150 degrees. Warm grease wipes off far easier than cold grease. But the metal must be cool enough to touch with gloved hands. Never pour water into a hot fire pot. The shock can crack parts and send steam into the electronics.
The Basic After-Use Routine
This routine fits most pellet grills. It takes about fifteen minutes once you know the steps.
Step 1: Run the Shutdown Cycle
Most pellet grills have a shutdown or cool-down cycle. It burns the last pellets in the fire pot and lets the fan run. Always use it. It clears the auger tube and stops pellets from jamming. Do not just pull the plug. A grill that stops mid-burn leaves half-burned pellets in the fire pot. They turn to damp ash and glue themselves in place.
Step 2: Brush the Grates While Warm
Lift the lid. Brush each grate with firm strokes from front to back. Work while the grates are still warm. Warm food residue lifts off in seconds. Cold residue needs real force. For stainless grates, a brass brush is gentle and safe. Our full guide on how to clean stainless steel grill grates goes deeper on brush choice and care. If food is stuck hard, lay a damp rag over the spot for five minutes, then brush again.
Step 3: Empty and Wipe the Grease System
Pull out the grease bucket or grease drawer. Pour the old grease into your metal can. Wipe the bucket with paper towels and warm soapy water. Dry it well. Grease left in the bucket turns rancid in days during warm weather. Big Green Egg owners know this rule from kamado cooking, and it holds true for pellet grills too. A clean grease path is a safe grease path.
Step 4: Scrape the Drip Tray
Remove the drip tray or heat diffuser plate. Scrape both sides with the plastic putty knife. Many owners cover the drip tray with wide aluminum foil before cooking. Then they just roll up the foil and throw it away. This is the fastest habit you can adopt. If you use foil, replace it after every two or three short cooks, or after every long smoke. Foil that tears or leaks lets grease pool under it, which defeats the purpose.
Step 5: Vacuum the Fire Pot and Barrel
Once the grill is cool enough, remove the grates and the drip tray. You will see the fire pot in the center of the barrel. Vacuum the ash from the fire pot with the shop vacuum. Then vacuum the floor of the barrel around it. Two or three cooks worth of ash is normal. More than that chokes the air flow. Napoleon notes in its care guides that steady air flow is the key to steady heat, and ash is the main thing that blocks it.
Do not blow the ash out with a leaf blower. The dust gets into the auger tube and the fan housing. A vacuum keeps the mess in one place. Wear a simple dust mask if ash dust bothers you.
Step 6: Wipe the Lid and Probe
Wipe the inside of the lid with a damp rag. Creosote, the sticky black tar from wood smoke, builds up there. A thin layer is normal. A thick, flaky layer can drop black specks onto food. If your grill has a probe, wipe it clean. A dirty probe reads wrong, and wrong readings ruin a long cook.
Deep Cleaning the Fire Pot, Auger, and Hopper
The quick routine above handles daily care. But every five to ten cooks, or once a month in heavy use, give the grill a deeper clean. This is where many owners find the cause of strange problems like flameouts and wild temperature swings.
Start with the fire pot. Pull it out if your model allows. Scrape the inside walls with a wire brush. Check the air holes around the sides. Ash packs into these holes like cement. Clear each hole with a small screwdriver or a pipe cleaner. Air must pass through these holes to feed the flame. Blocked holes are the most common cause of weak fires.
Next, check the auger. You do not need to take the auger apart. Just look into the end of the auger tube near the fire pot. Sawdust from broken pellets gathers there. Vacuum it out. If pellets ever got wet in the hopper, they swell into a paste that jams the auger. In that case, empty the hopper fully and run the auger until it is clear. Some grills have a hopper clean-out door that drops pellets into a bucket. Use it. It beats scooping by hand.
Now the hopper itself. Pellet dust settles at the bottom of the hopper over time. This dust, called fines, feeds poorly and burns dirty. Every month, empty the hopper and vacuum the dust from the bottom. Sift pellets through a simple kitchen colander before you pour them back in. The colander catches the fines and lets whole pellets through. The testing teams at Consumer Reports rate pellet grills in part on how well they handle long, steady burns, and clean fuel is a big part of that.
Check the hopper lid seal too. A lid that does not close tight lets rain and damp air in. Damp pellets swell and jam. If the seal looks worn, replace it. It is a cheap part that saves costly repairs.
Cost and Price of Cleaning Supplies
Cleaning a pellet grill costs very little. A good grill brush runs about ten to twenty dollars. A small shop vacuum costs thirty to sixty dollars if you do not own one, and it serves the whole garage. A box of wide heavy-duty foil costs under ten dollars and covers many cooks. A bottle of grill-safe degreaser runs five to twelve dollars. Shop rags and paper towels are a few dollars a month.
Compare that to the cost of neglect. A replacement hot rod igniter costs twenty to forty dollars. A new auger motor can cost over a hundred. A grease fire can warp a drip tray or damage the paint. Fifteen minutes of cleaning after each cook is the cheapest insurance in outdoor cooking.
Care and Upkeep Through the Seasons
Daily cleaning keeps the grill safe. Seasonal care keeps it alive for a decade. Read our pellet grill maintenance tips for beginners for a full calendar, but here are the main points.
In spring, before the first big cook, do a full deep clean. Check the power cord for cracks. Test the igniter rod. Look at the gasket around the lid. If it is flat and hard, replace it. A good seal holds smoke and heat where they belong.
In summer, the heavy cooking season, watch the grease system most. Long smokes make a lot of fat. Empty the grease bucket before every long cook, not after. Keep the hopper full only for the cook at hand during humid weeks, and store the rest of the bag indoors in a sealed bucket.
In fall, clean the chimney or exhaust vent. Soot narrows the vent over a season of use. A bottle brush and warm water clear it in minutes.
In winter, protect the grill from damp. Empty the hopper if the grill will sit for weeks. Store pellets in a dry place in sealed buckets. Use a fitted cover made for your model.
Once a year, check every bolt and screw. Heat cycles loosen them. Tighten the legs, the side shelf, and the hopper mounts.
Safety Rules to Follow Every Time
Pellet grills are safe machines, but they burn wood and make real fire. Treat them with respect.
– Place the grill at least three feet from walls, railings, and overhangs. Never use it under a low roof or inside a garage. – Keep the grease system clean. Grease fires start in dirty trays and buckets. – Never leave a lit grill fully alone for hours. Check it at least once an hour during long smokes. – Keep a fire extinguisher rated for grease fires near the cooking area. Baking soda also smothers small grease flames. Never use water on a grease fire. – Let ash cool fully before you throw it away. Store cool ash in a metal can with a lid, away from the house, for at least two days. – Unplug the grill before you vacuum near the auger or fan. Moving parts and power do not mix with fingers. – Keep children and pets away from the hot grill. The barrel stays hot long after shutdown.
If you ever see thick white smoke pouring from the grill, or flames in the hopper, shut the grill down and step back. Do not open the hopper lid wide. Call the maker’s support line once the grill is cool. Guides at AmazingRibs and The Spruce Eats both stress the same point. Calm, quick action beats panic every time.
Frequently Asked Questions
How often should I vacuum the ash from my pellet grill?
Vacuum the fire pot after every two or three short cooks, or after every long smoke over six hours. In practice, most owners fold it into the after-use routine. It takes two minutes with a shop vacuum. Waiting longer lets ash pack into the air holes, and then the grill struggles to hold temperature.
Can I use a regular vacuum instead of a shop vacuum?
A shop vacuum is better. Ash is very fine and can clog a home vacuum fast. If you must use a home vacuum, use one with a bag and a fine filter, and empty it right after. Never vacuum warm ash with any vacuum. Cool ash only.
Should I foil my drip tray or leave it bare?
Foil is the easier path for most owners. It makes cleanup a one-minute job. Use wide, heavy-duty foil and press it smooth so grease runs off into the bucket. Change it often. Some owners prefer a bare tray scraped clean each time, which works fine too.
Do I need to empty the hopper after every cook?
No. In dry weather, pellets keep well in a closed hopper for a week or two. In damp or humid weather, empty the hopper after each cook and store pellets indoors in a sealed bucket. Damp pellets swell, jam the auger, and burn badly. When in doubt, empty it. Dry pellets are the base of every good cook.
Why does my pellet grill swing in temperature?
The most common cause is ash in the fire pot blocking air flow. The second is damp or dusty pellets. The third is a dirty temperature probe giving false readings. Clean the fire pot, sift your pellets, and wipe the probe. In most cases, one of these three fixes the swing.
A Short Final Word
A pellet grill rewards the owner who keeps it clean. The work is small. Brush the grates, empty the grease, scrape the tray, and vacuum the ash. Do it while the grill is warm, and it takes less time than washing the dinner dishes. Add a deeper clean once a month, and your grill will hold temperature, burn clean pellets, and turn out better food. The next time you roll the grill out for a weekend cook, you will taste the difference that a clean fire makes.
References
AmazingRibs.com. (n.d.). Barbecue and grilling science. https://www.amazingribs.com Big Green Egg. (n.d.). Kamado grills and outdoor cooking. https://www.biggreenegg.com Char-Broil. (n.d.). Gas and charcoal grills. https://www.charbroil.com Consumer Reports. (n.d.). Product reviews and ratings. https://www.consumerreports.org Napoleon. (n.d.). Fireplaces, grills, and heating products. https://www.napoleon.com The Spruce Eats. (n.d.). Recipes and cooking guides. https://www.thespruceeats.com Traeger. (n.d.). Wood pellet grills. https://www.traeger.com Weber. (n.d.). Grills and outdoor cooking. https://www.weber.com
Was this guide helpful?

About Sarah Mitchell
The My Garden US editorial team writes practical, in-depth home and garden guides for American homeowners — tested advice, no fluff.