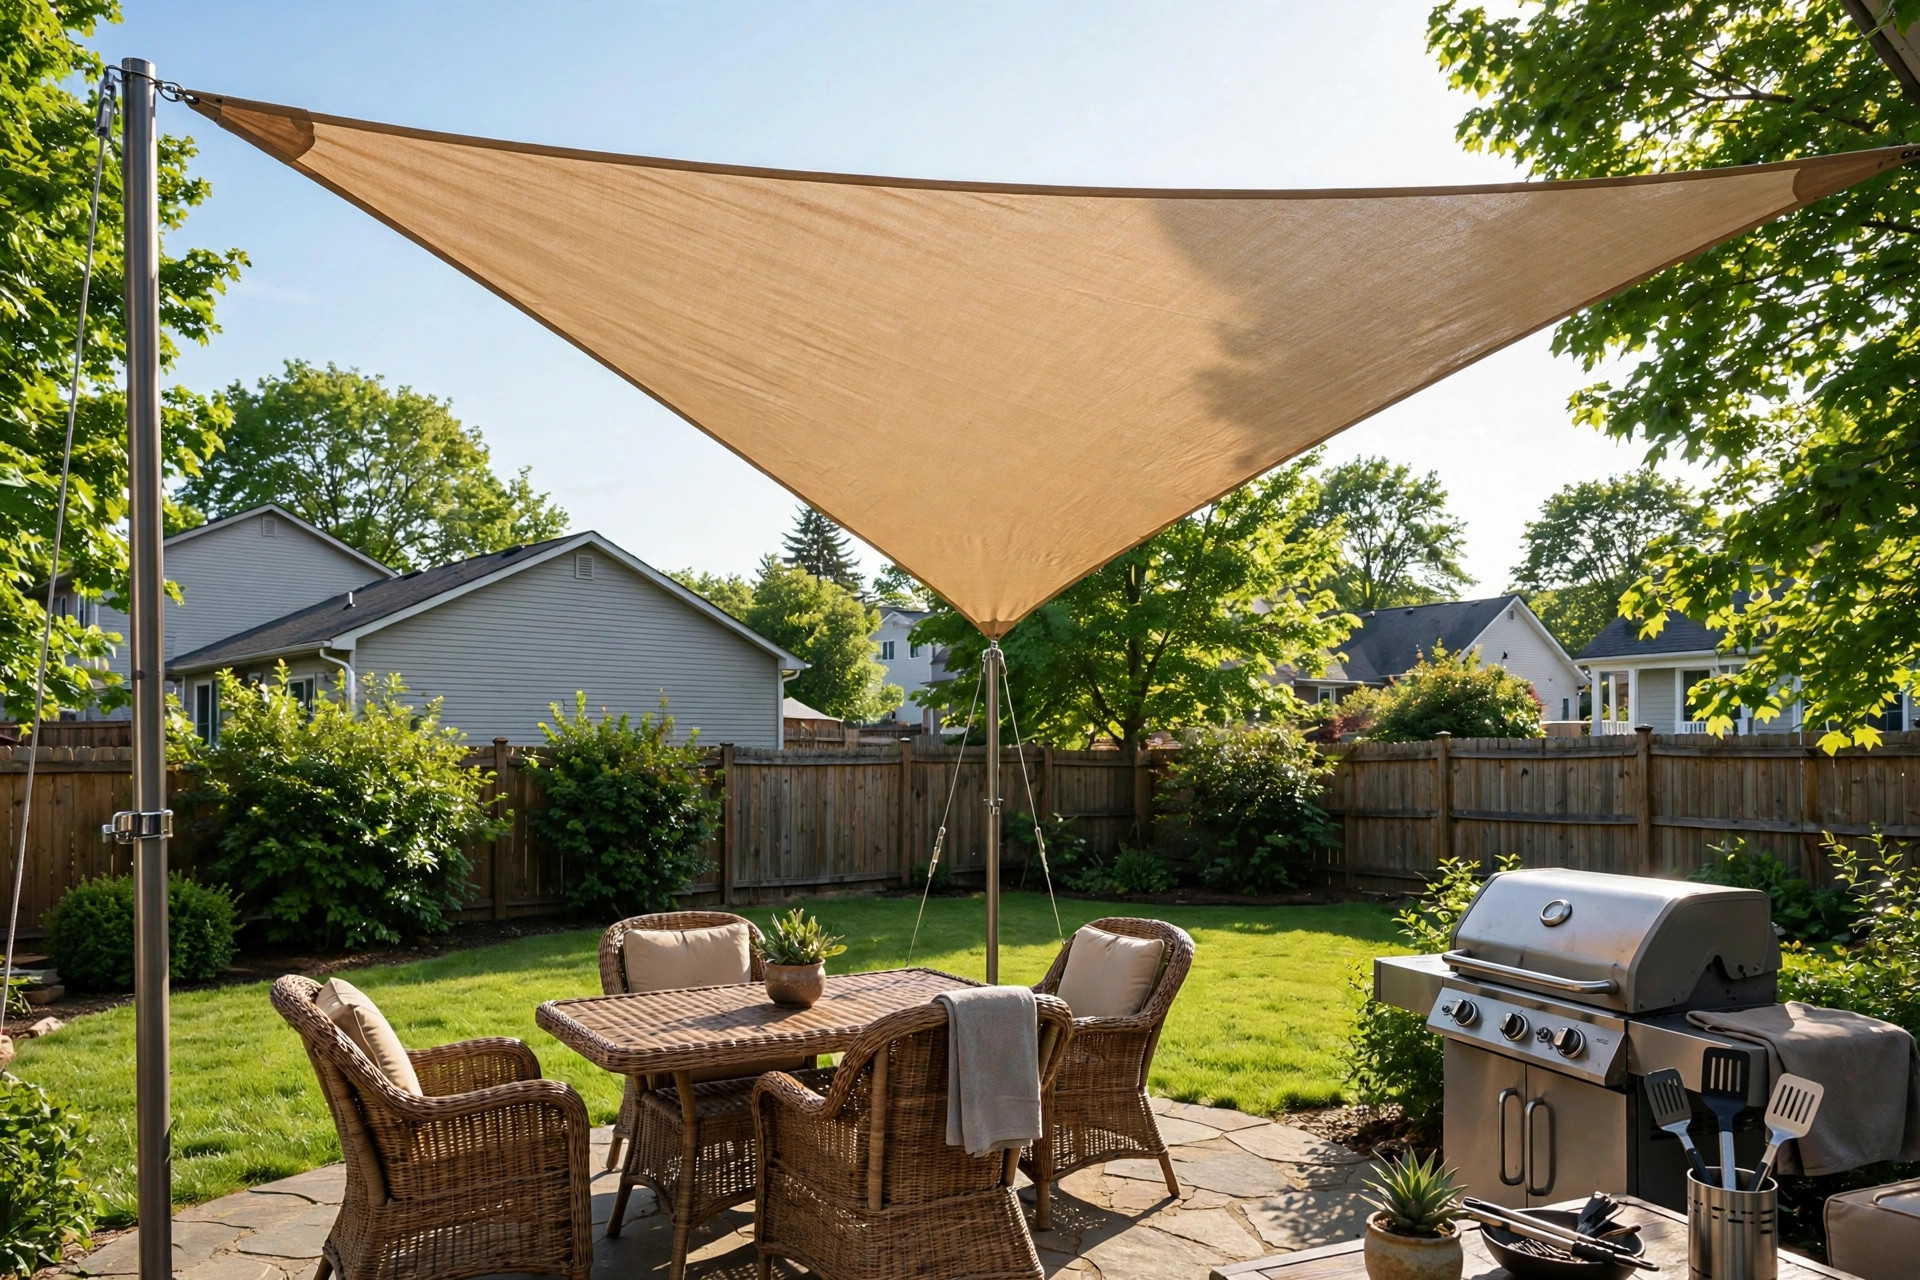

A shade sail is one of the cheapest ways to make a hot patio livable in summer. It is a large sheet of woven fabric, cut into a triangle or square, and stretched tight between anchor points. When it is hung well, it blocks most of the harsh sun, lowers the temperature under it by several degrees, and gives the yard a clean, modern look.
This patio shade sail installation guide walks you through the whole job. You will learn how to pick the right size and shape, set posts or find solid anchors, hang the sail with the right hardware, tension it so it does not flap or sag, and keep it in good shape for years.
Why It Matters
Many families buy a shade sail, string it up between two trees and a fence post, and watch it sag within a week. A loose sail flaps in the wind, wears out at the corners, and can tear free in a storm. A poor hang job wastes money and can even damage what it is tied to.
A proper install matters for three reasons. First, comfort: a tight sail with the right fabric blocks up to 90 percent of the sun’s burning rays while still letting some breeze through. Second, life span: quality fabric can last five to ten years if it is kept taut and taken down before winter storms. Third, safety: a sail catches wind like a boat’s sail, so its anchors must be strong enough to hold the load.
Homeowners who take an afternoon to plan the job first usually end up with a sail that looks good and lasts. Those who rush often redo the work.
What to Look For Before You Buy: Patio Shade Sail Installation Guide
Fabric and Shade Rating
The best shade sails use high-density polyethylene, often called HDPE. It is a knitted fabric, not a solid sheet. That weave is the whole point: it lets hot air escape and wind pass through a little, so the sail stays cooler and pulls less on its anchors than a solid tarp would.
Look for a UV block rating of at least 90 percent. Good sails also state that the fabric is fade-resistant and tested for outdoor use. If you want rain protection too, some sails use waterproof coated fabric. Be aware that a waterproof sail traps heat and catches more wind, so it needs stronger anchors and a steeper slope so water runs off instead of pooling.
Shape and Size
Triangle sails look sharp and are easy to tension, but one triangle rarely covers a whole patio. Many people layer two or three triangles at different heights for a striking look. Square and rectangle sails cover more area with a single piece but need four strong anchor points.
Measure your patio carefully. A common mistake is buying a sail that is too small. The sail should reach past the edges of the seating area so the shade stays over you as the sun moves. Add at least two feet of hardware space at each corner: turnbuckles and rope need room to work.
Hardware Quality
Buy marine-grade stainless steel hardware. It costs more than zinc-plated steel, but it will not rust and stain your patio in the first season. You will need, at each corner, a turnbuckle for tensioning, a snap hook or shackle to connect the sail, and an anchor point: either a post, a pad eye bolted to a wall, or a lag bolt into a solid roof beam.
Rope seems like a simple choice, but it stretches and loosens over time. Turnbuckles are the professional tool for the job. They let you tighten the sail a little at a time and re-tighten it as the fabric settles.
For more outdoor comfort ideas, see our guide to weatherproof patio furniture covers heavy duty, which shows how to protect the furniture sitting under your new shade.
Types and Options
Triangle Sails
The triangle is the classic shade sail. Three corners mean only three anchor points, which makes it the easiest sail to install. It tensions well and looks modern. The trade-off is coverage: a triangle covers less ground than a square of the same width.
Square and Rectangle Sails
Four-sided sails cover a dining table or a full seating area in one piece. They need four anchor points and a bit more care to tension evenly, because the middle of a wide sail can belly. If you choose a rectangle, plan for a slope of at least 20 to 30 degrees from high point to low point so rain runs off.
Posts vs. Existing Structures
You can mount one or two corners to the house or a sturdy fence, but do not attach a sail to anything flimsy. A gutter, a thin fence rail, or a rotten pergola beam will not hold. Most do-it-yourself installers set steel or heavy wooden posts in concrete for at least two of the corners. This gives you full control over height and angle.
Many shoppers compare shade sails while browsing patio goods at IKEA, which stocks a wide range of outdoor furniture that pairs well with a shaded patio.
Cost and Price
A basic triangle shade sail in a standard size, about 12 feet per side, costs between 40 and 120 dollars. Larger squares and premium brands can run 150 to 300 dollars. Hardware kits with turnbuckles, hooks, and pad eyes usually add 50 to 100 dollars.
Posts are the biggest extra cost. A galvanized steel post set in concrete costs roughly 60 to 150 dollars per post, counting the post, concrete, and gravel. If you need four posts and choose to hire a handyman to dig and set them, the total project can reach 500 to 1,000 dollars.
Hiring a professional installer for the whole job typically costs 300 to 800 dollars on top of materials, depending on how many posts must be set. For most homeowners, setting the posts yourself and hiring help only if needed keeps the bill reasonable.
Independent product testing at Consumer Reports is a useful check when comparing shade sail brands and hardware kits before you buy.
Step-by-Step Installation
Step 1: Plan the Layout
Draw your patio to scale on paper. Mark where the sun hits at noon and in the late afternoon. Decide where each corner of the sail will land. Plan a slope: the high corners should face the house and the low corners should point away, so rain drains off the patio, not onto it.
Check what is above the sail site. Power lines, tree limbs, and roof edges all need clearance. Call your local utility marking service before you dig any post holes so you do not hit buried lines.
Step 2: Set the Posts
Dig each post hole at least 36 inches deep, or deeper if your ground freezes in winter. Make the hole three times as wide as the post. Put six inches of gravel at the bottom for drainage, set the post, and pour concrete around it.
Lean each post slightly away from the center of the sail, about five degrees. This may look odd at first, but it is correct: the post will be pulled toward the sail once the fabric is tensioned, and the lean lets it settle plumb. Let the concrete cure for at least 48 hours before you hang anything.
Step 3: Mount the Anchor Points
On the house side, bolt a stainless pad eye into a solid stud or masonry with a lag shield. On posts, use a collar with an eye bolt or a through-bolt. Every anchor should sit a little higher than the sail’s corner will, because the turnbuckle takes up space between the anchor and the fabric.
Step 4: Hang the Sail Loosely
Unfold the sail and lay it out under the anchor points. Connect one corner at a time, starting with the highest corner. Use snap hooks to join the sail’s D-ring to the turnbuckle, then the turnbuckle to the anchor. Leave every turnbuckle nearly fully extended at this stage. Do not tighten yet.
Work your way around all the corners. The sail will look loose and wrinkled. That is normal and expected at this stage.
Step 5: Tension in Rounds
Now tighten each turnbuckle a little, moving from corner to corner in rounds. Tighten one corner about an inch, then move to the next. Keep the tension even so the fabric stretches uniformly. The center should be drum-tight with only a gentle curve, and the edges should show no sag or wrinkles.
Do not over-tighten. You want the sail firm, not straining at the seams. A good test: press the center of the fabric with your palm. It should give an inch or two and spring back.
Step 6: Check the Drainage Slope
Stand back and look at the sail from the side. The low edge should drop at least 20 degrees from the high edge. If water would pool, raise the high anchors or lower the low ones. Re-tension after any height change.
Readers who are dressing the patio under their sail may like our piece on how to clean outdoor furniture cushions, which keeps seating fresh under the new shade.
Care and Upkeep
Take the sail down before heavy winter weather if you live where snow and ice are common. The fabric is strong, but a loaded snowdrift can tear it or bend a post. Wash the sail once or twice a year with mild soap and a garden hose. Never use bleach or a pressure washer, which can break down the UV coating.
Re-tension the turnbuckles each spring. Fabric relaxes a little in its first year, and a few turns on each corner will pull it drum-tight again. Inspect the hardware for rust or cracks, and replace any tired snap hooks before the windy season.
Store the sail dry and folded in a cool place over winter. A fabric bag or a clean storage bin keeps mice and mildew away. With this simple care, a quality sail can shade your patio for the better part of a decade.
Retailers such as Wayfair carry replacement sails, hardware kits, and storage solutions when it is time to refresh the setup.
Safety
A shade sail is not a toy and not a climbing net. Keep children from hanging on it. In high winds, take the sail down rather than risk it tearing free. Wind load is the main force the sail must survive, and even a well-set post can lean in soft soil after a hard storm.
Check your local rules before you build. Some towns require a permit for posts over a certain height, and homeowner associations may limit sail colors or sizes. If your sail mounts to the house, make sure the wall anchor goes into framing, not just siding. When in doubt, have a contractor check the anchor points. A one-hour inspection is cheap insurance.
For seating that holds up under the sail, our review of the best adirondack chair for tall people covers chairs built for larger frames and hot afternoons.
FAQ
How long does a patio shade sail installation take?
For a simple hang between existing solid anchors, plan two to four hours with two people. If you must dig and set posts in concrete, add a day for the digging and pouring plus two days of cure time before you tension the sail.
What size shade sail do I need for a 12 by 12 patio?
A 16 by 16 foot square sail, or two overlapping triangles, will cover a 12 by 12 patio with room for the shade to move as the sun travels. Remember to leave about two feet at each corner for the turnbuckle hardware.
Can I attach a shade sail to my house?
Yes, if you bolt into solid framing or masonry. Use a stainless pad eye with lag bolts driven into a wall stud or a concrete anchor in a brick wall. Never attach a sail to siding, fascia boards, or gutters alone.
Do shade sails block rain?
Standard knitted HDPE sails block sun but let rain pass through. Waterproof sails exist, but they need a steep slope so water runs off, plus stronger anchors to handle the extra wind load. They also trap more heat underneath.
How windy is too windy for a shade sail?
Most quality sails handle normal breezes and moderate gusts when properly tensioned. Take the sail down if storms with winds above 40 to 50 miles per hour are forecast. A few minutes of work now prevents a torn sail and bent posts later.
Should I hire a professional?
If you are handy and the anchors are straightforward, this is a fine do-it-yourself project. Hire a professional if you need multiple posts set, if any anchor attaches to the roof, or if your soil is very soft or rocky.
A Short Final Word
A shade sail rewards a little planning. Measure twice, set solid anchors, use stainless hardware, and tension the fabric in patient rounds. The result is a cooler patio, a sharper-looking yard, and a shade structure that stands up to summer after summer. Follow this patio shade sail installation guide step by step, and your first warm weekend under the sail will make the afternoon of work well worth it.
References
IKEA. (n.d.). Outdoor furniture and patio products. https://www.ikea.com Wayfair. (n.d.). Outdoor furniture and patio. https://www.wayfair.com Consumer Reports. (n.d.). Product reviews and ratings. https://www.consumerreports.org
Was this guide helpful?

About Sarah Mitchell
The My Garden US editorial team writes practical, in-depth home and garden guides for American homeowners — tested advice, no fluff.
You May Also Like

Patio Furniture for Rooftop Deck Ideas: A Complete Guide
September 29, 2026 0 views
The Best Patio Lights for Evening Entertaining
June 25, 2026 0 views
Outdoor Wall Sconce Lighting for Patio: A Practical Guide
June 17, 2026 0 views