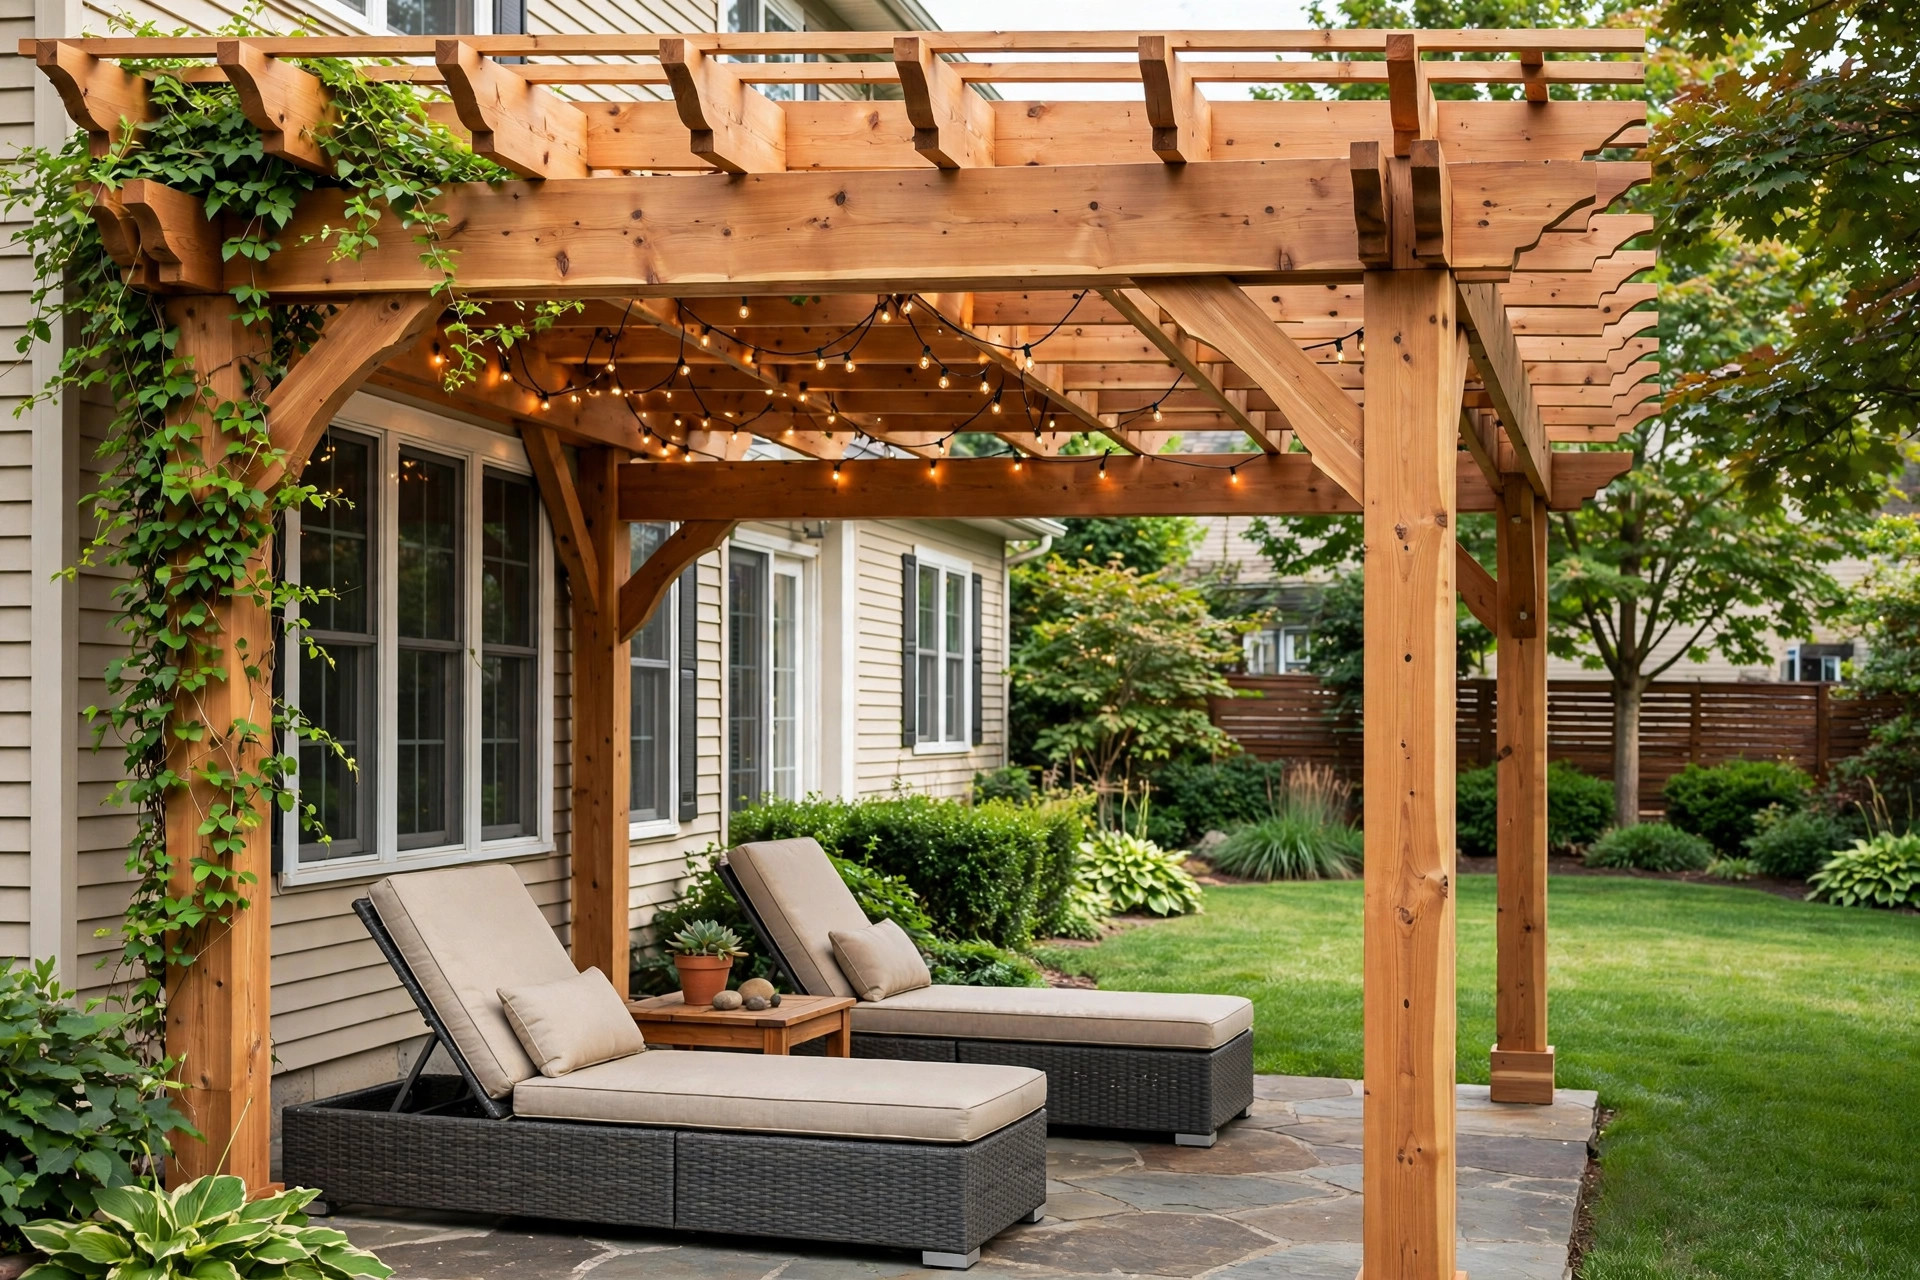

A pergola can change a plain yard into a place where the family wants to sit. It gives light shade, marks off an outdoor room, and adds shape to the back of the house. Many people now build one with a kit instead of hiring a full crew. A kit ships with the posts, beams, rafters, and hardware you need, cut to length and ready to set. This pergola installation kits reviews and buying guide explains what these kits offer, how they differ, what they cost, and how to pick the right one for your home.
Why a Pergola Kit May Be Worth the Cost
A pergola is an open-air frame of posts and cross beams. It does not have a solid roof. It casts broken shade, supports vines, and frames a seating or dining area. A kit puts the whole job in one box. The lumber or aluminum arrives pre-cut. The bolts, brackets, and footings are matched to the parts. The plans spell out each step in order.
The first gain is price. A custom pergola built on site can cost two or three times what a kit costs. With a kit you pay for the parts and your own weekend labor. The second gain is time. A kit can go up in one or two days with two adults. A stick-built version may take a carpenter a week. The third gain is ease. You do not need to size every beam or guess at a span table. The maker has done the math.
Kits also help with permits. Many towns ask for a simple plan before you build a yard structure. Kit makers often include drawings that show footing depth, post size, and anchor points. Take those drawings to the permit office. They can save a long wait.
What to Look for Before You Buy: Pergola Installation Kits Reviews and Buying Guide
Material
Wood is the classic choice. Cedar and redwood resist rot and bugs and look fine without paint. Pressure-treated pine costs less but needs stain to stay handsome. Aluminum kits weigh less and never need paint. Vinyl or PVC kits also need no upkeep, though they can look plain next to a wood house. Fiberglass is rare but strong.
Pick the material that fits your climate. Wood suits dry and mild zones. In wet ground, aluminum or vinyl may last longer. In snow country, check the load rating. Heavy snow can crush a light kit.
Size and Post Layout
Kits run from small 8 by 8 foot models to large 20 by 12 foot frames. Measure your patio or deck first. Leave at least two feet of clear space around tables and chairs. Four-post kits are the norm. Six-post kits suit wide spans. Tall kits give more headroom but catch more wind.
Watch the post spacing. Most kits set posts six to ten feet apart. Longer spans need thicker beams. Do not stretch a kit past the span its plans allow.
Hardware and Connectors
Good kits use hot-dip galvanized or stainless steel hardware. Cheap plated screws rust fast outdoors. Look for through-bolts at the beam posts, not just lag screws. Base brackets should let the post stand off the concrete so water does not pool at the wood. The best kits hide the bolts with trim caps for a clean look.
Shade Level
A pergola never gives full shade. The rafter spacing sets how much sun gets through. Tight spacing gives more shade. Loose spacing gives more sun and shows more sky. Some kits sell add-on shade panels or cloth canopies. These help on hot afternoons. Reviews at The Spruce often note how shade level feels in real use.
Wind and Snow Ratings
Ask for the kit’s design loads. A good maker states the wind speed and snow load the frame can take. In calm inland towns the rating may not matter much. Near the coast or in lake-effect snow belts it matters a lot. If the rating is not in the listing, write to the maker before you buy.
Types of Pergola Kits on the Market
Freestanding Kits
These stand alone on four or six posts. You set them on a patio, deck, or lawn. They need solid footings because wind can tip a tall frame. Freestanding kits are the most common and come in the most sizes.
Attached Kits
These bolt one side to the house wall or fascia. They need fewer posts and less bracing. They also tie the yard to the house in a neat way. You must flash the wall joint so rain does not run into the siding. The This Old House site has clear notes on flashing outdoor joints.
Arbor and Arch Kits
Small two-post arbors mark a path or gate. They are not true pergolas but use the same parts. They go up fast and cost little. Many buyers pair an arbor with a fence line.
Modern Aluminum Kits
These use box aluminum beams with a clean square look. Many have louvered roofs that open and close. They cost more than wood but need no stain and no paint. Lowe’s and Home Depot both stock several aluminum models.
Pergola Installation Kit Reviews: How to Read Them
Reviews can help, but they can also mislead. Read them with a plan. Start with the low-star reviews. Look for the same complaint twice. If two buyers say the parts list was short or the holes were off, take note. One angry review may just be bad luck. A pattern is a fact.
Check the reviewer’s skill level. A buyer who has built decks before will judge a kit harder than a first-timer. Look for reviews with photos. A photo shows how the kit looks after a year in the weather, which the product photo will never show.
Pay close heed to notes about the instructions. Pergola kits live or die by their plans. Reviewers at Family Handyman often say a kit was fine once they read the whole manual first. If reviews say step four makes no sense, plan extra time.
Also note delivery. Pergolas ship freight. Reviewers often report chipped parts or late trucks. Ask the seller how damage claims work before you order.
Cost and Price Ranges
Kit prices run wide. Small wood kits start near 300 dollars. Mid-size cedar kits run 800 to 2,000 dollars. Large kits with premium wood or aluminum can top 4,000 dollars. Louvered-roof aluminum systems run 5,000 dollars and up.
Add the site costs. Concrete for footings may run 100 to 300 dollars. Stain or sealant for a wood kit runs 50 to 150 dollars. Rental of a post-hole auger is about 80 dollars a day. If you hire a hand for one day, budget 200 to 400 dollars for labor help.
Compare the kit total to a local builder quote. Get one quote before you buy. In some towns a builder is not much more than the kit once you count footings and stain. In most cases the kit still wins on price.
How to Install a Pergola Kit
Permits and Layout
Call the town office first. Ask if a pergola needs a permit at your size. Ask about setback rules from the lot line. Some towns count a pergola toward lot coverage. Mark the post spots with spray paint and check the diagonals so the layout is square.
Footings
Dig below the frost line in cold states. Pour concrete into tube forms and set the post anchors while the mix is wet. Let the concrete cure at least two days. A level post base makes every later step easy.
Posts and Beams
Set the posts plumb and brace them with scrap lumber. Lift the beams into place with a helper. Never work overhead alone on a ten-foot post. Through-bolt the joints and snug them tight. Check for plumb again after each beam goes up.
Rafters and Trim
Lay the rafters on the beams per the plan. Space them even with a tape, not by eye. Add the end trim and caps last. Then seal wood kits on all sides, top and bottom. The Bob Vila site has a step-by-step on sealing outdoor wood.
Final Checks
Stand back and look down each line of rafters. Tighten every bolt once more after a week of weather. Keep the manual and the parts list in a file. You may need a part number years later.
Care and Upkeep
Wood pergolas need stain every two to three years. Wash the frame each spring with mild soap and a brush. Check bolts each year and tighten what has worked loose. Trim vines so they do not lift the rafters. Clear leaves off the beams in fall so water does not sit.
Aluminum and vinyl kits need little care. A yearly wash keeps them clean. Check the anchor bolts after strong storms. Louvered models need the moving parts kept free of leaves and ice.
Safety Points
A pergola is a tall sail in a storm. Anchor every post to a real footing. Do not set posts in soil alone. Keep grills and fire pits well away from wood posts and rafters. Hanging swings from a kit beam is risky unless the maker rates it for the load.
Call the dig line before you dig footings. Buried gas and power lines are common in yards. The service is free and takes only a few days. If you tie the pergola to the house, flash the joint well so water does not reach the wall sheathing.
Pergola Kits and the Rest of the Yard
A pergola looks best as part of a plan. Pair it with a path, lights, and seating. If your yard work runs wider, you may also be pricing other outdoor jobs. Our guide to the best gutter installation services near me can help when roof water is the next task. A stone path under the frame looks sharp, and our notes on the best paver walkway installation near me cover that job. For steps leading down from a raised patio, see our piece on the best exterior stair railings for midwest homes.
Exterior trim boards from makers like James Hardie and CertainTeed are worth a look if you want the pergola posts to match new siding.
FAQ
How long does it take to install a pergola kit?
Most kits take one to two days for two adults. Small arbors go up in half a day. Large six-post kits can take a full weekend. Add time for concrete to cure before you set posts.
Do I need a permit for a pergola kit?
It depends on your town. Many towns require a permit for structures over a set size or height. Some treat attached pergolas like deck additions. Call the building office with the kit’s size before you order.
Will a pergola kit keep rain off my patio?
No. A standard pergola has an open roof and lets rain through. Some buyers add clear roof panels or a cloth canopy for light rain cover. If you need full cover, look at a gazebo or a solid patio cover instead.
Can I set a pergola kit on an existing deck?
Only if the deck framing can carry it. A pergola adds wind load that decks were not built for. Have a carpenter check the joists and footings. Many makers state that their kits need independent footings.
Which wood is best for a pergola kit?
Cedar and redwood last longest with the least care. Pressure-treated pine costs less and does fine if you stain it. In wet ground, consider aluminum or vinyl instead of wood.
How much shade does a pergola really give?
Expect partial shade, roughly half the sun of open sky with standard rafter spacing. Tight rafter spacing gives more shade. Add-on cloth panels can raise shade to near full on hot days.
A Final Word
A pergola kit is one of the fairest deals in outdoor building. You get a real structure, honest shade, and a new outdoor room for a fair price and a weekend of work. Read reviews with care, buy for your climate, and do not skimp on footings. Do the setup right and the frame will stand straight for years. This pergola installation kits reviews and buying guide gives you the base. The rest is up to your yard and your hands.
References
Bob Vila. (n.d.). Home improvement advice. https://www.bobvila.com CertainTeed. (n.d.). Building materials and exterior products. https://www.certainteed.com Family Handyman. (n.d.). DIY home repair and maintenance. https://www.familyhandyman.com James Hardie. (n.d.). Fiber cement siding and exterior products. https://www.jameshardie.com Lowe’s. (n.d.). Home improvement products. https://www.lowes.com The Home Depot. (n.d.). Home improvement products. https://www.homedepot.com The Spruce. (n.d.). Home and garden advice. https://www.thespruce.com This Old House. (n.d.). Home renovation guidance. https://www.thisoldhouse.com
Was this guide helpful?

About Jennifer Lee
The My Garden US editorial team writes practical, in-depth home and garden guides for American homeowners — tested advice, no fluff.
You May Also Like

The Best Insulated Vinyl Siding for Midwest Homes: A Homeowner’s Guide
September 20, 2026 0 views
Best Paver Walkway Installation for Homeowners
July 10, 2026 0 views
Best Stucco Exterior Repair Near Me: How to Find a Trusted Contractor
May 26, 2026 0 views